Halloween is the perfect time to get creative in the kitchen and surprise family, friends, and trick-or-treaters with treats that are both spooky and delicious.
Making candy at home can be fun, easy, and a great activity to do with kids or even on your own.
Below are five festive Halloween candy ideas that are simple to make but outstanding in presentation and flavor.
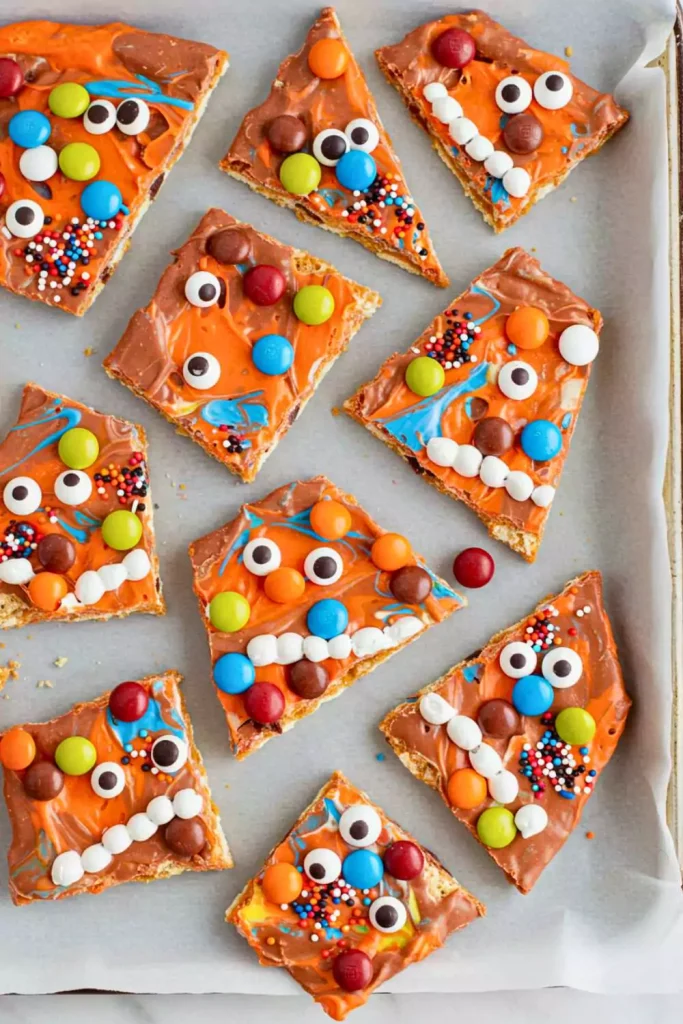
1. Monster Bark
This fun and colorful candy bark is incredibly easy to make and always a hit at Halloween gatherings. It starts with a crunchy cracker or cookie base and is layered with melted colored candy, turning into a spooky candy mosaic.
Kids especially enjoy decorating it with candy eyes and sprinkles that make each piece look like a funny monster face.
The best part is, no baking is involved, and you can customize the colors however you like.
Ingredients:
- Graham crackers or digestive biscuits
- Colored candy melts (orange, purple, green, black, etc.)
- Candy eyeballs
- Halloween-themed sprinkles
Instructions:
Step 1: Create the Base
Line a baking sheet with parchment paper and arrange the graham crackers in a solid layer without gaps.
Step 2: Melt the Candy
Melt each color of candy melts separately in microwave-safe bowls, heating in 20–30 second intervals and stirring until completely smooth.
Step 3: Pour and Swirl
Pour the melted candy over the graham cracker base in separate pools or drizzle in swirling motions. You can use a toothpick to swirl the colors together for a marbled effect.
Step 4: Decorate Quickly
While the candy is still warm, scatter candy eyeballs all over and sprinkle generously with Halloween sprinkles. Press them in lightly so they set into the candy.
Step 5: Let It Harden
Allow the bark to sit at room temperature or place it in the fridge until fully set. Once firm, break into rough pieces and serve.
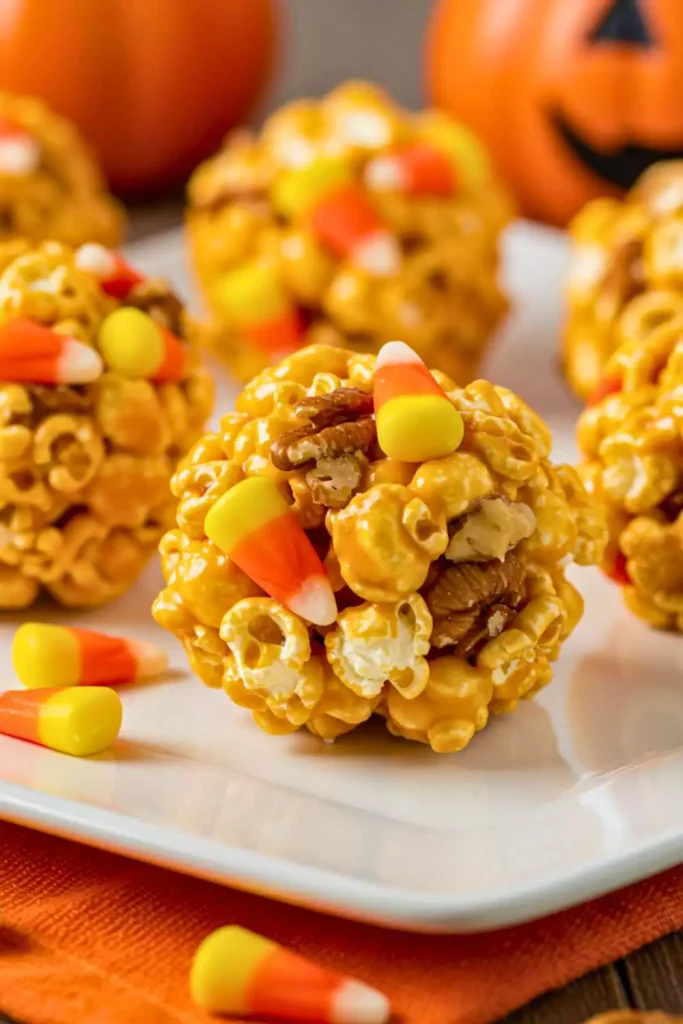
2. Candy Corn Popcorn Balls
These popcorn balls are sweet, chewy, and full of Halloween spirit. Mixing colorful candy corn and nuts adds texture and flavor, while the marshmallow coating helps bind everything together.
They’re great to wrap individually and hand out, and the mix of salty and sweet makes them irresistible. They’re perfect for parties because they can be made ahead and stored easily.
Ingredients:
- Freshly popped popcorn
- Candy corn
- Salted peanuts (optional but delicious)
- Mini marshmallows or corn syrup and sugar as a binder
- Butter (for handling the mixture)
Instructions:
Step 1: Prepare the Popcorn
Pop a large bowl of popcorn and remove any unpopped kernels so no one bites into a hard piece.
Step 2: Make the Binder
In a saucepan, melt butter and mini marshmallows over medium-low heat until they become a smooth, sticky mixture. Stir constantly to keep it from burning.
Step 3: Combine and Mix
Pour the melted marshmallow over the popcorn. Add candy corn and peanuts immediately and stir quickly using a spatula until everything is evenly coated.
Step 4: Shape the Balls
Coat your hands lightly with butter or oil to prevent sticking, then scoop handfuls of the mixture and form them into firm balls. You can make them large or bite-sized based on your preference.
Step 5: Cool and Serve
Place the formed balls onto parchment paper and let them firm up completely. Once cooled, wrap each in plastic or place in treat bags.
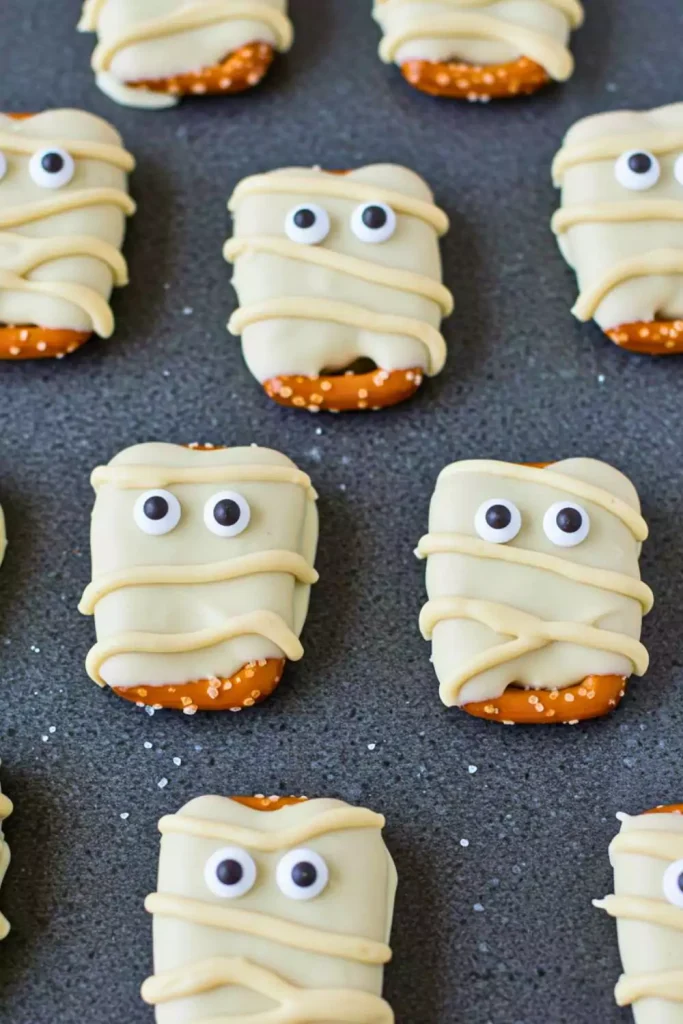
3. Mummy Pretzels
These cute and spooky mummy pretzels combine salty crunch with sweet white chocolate. By drizzling the coating in thin lines across each pretzel, you create the look of mummy bandages.
The candy eyes add personality to each one, making them perfect for kids’ parties or Halloween snack trays.
They’re quick to prepare and look like you spent much more effort than you actually did.
Ingredients:
- Pretzel rods or pretzel sticks
- White candy melts or white chocolate chips
- Candy eyeballs
Instructions:
Step 1: Prepare the Pretzels
Lay pretzel sticks in rows on a parchment-lined tray, making sure they don’t touch each other.
Step 2: Melt the White Chocolate
Melt white chocolate or candy melts in a microwave-safe bowl, stirring until smooth. If the consistency is too thick, add a tiny bit of coconut oil to thin it out.
Step 3: Dip and Drizzle
Dip each pretzel about ¾ of the way into the melted chocolate. Lay it back on the parchment paper. Then use a spoon or piping bag to drizzle extra chocolate over the pretzel in zigzag lines to resemble mummy bandages.
Step 4: Add Eyes
While the coating is still wet, gently press two candy eyeballs onto the upper part of the pretzel stick to form the mummy’s face.
Step 5: Let Harden
Let the pretzels sit at room temperature or refrigerate until the chocolate sets completely. Once hardened, they’re ready to serve or package.
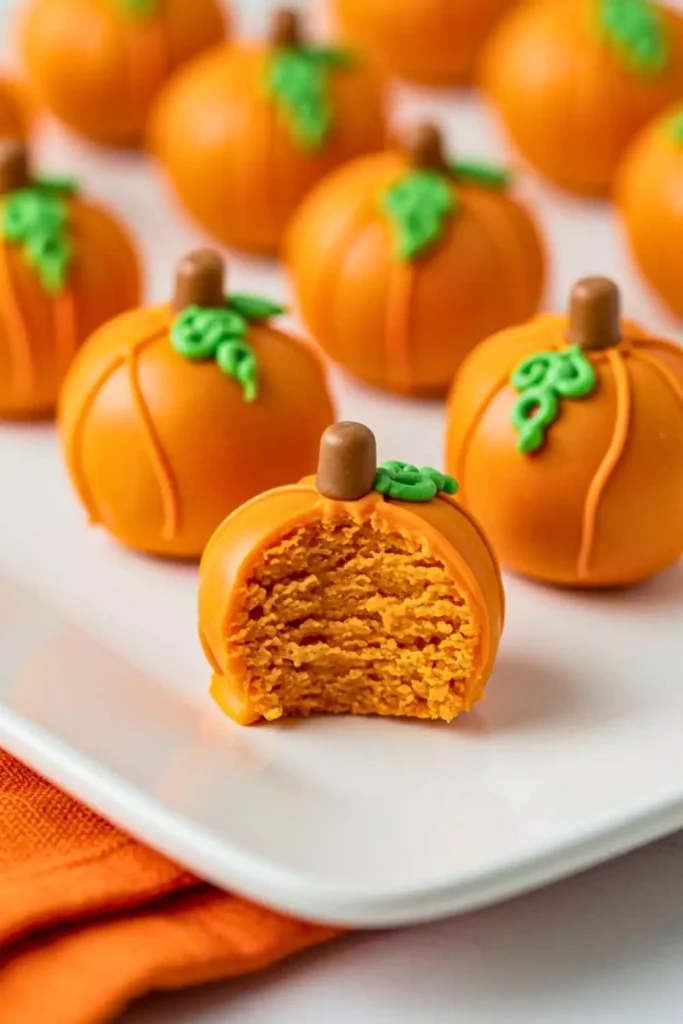
4. Pumpkin Truffles
These adorable pumpkin truffles are rich, creamy, and ideal for anyone who loves gourmet-style treats. The center can be made from a simple chocolate ganache or a flavored cream cheese mix.
When coated in orange candy and decorated with green toppings or a small candy stem, they look just like miniature pumpkins.
They’re elegant and great for adult parties or dessert platters.
Ingredients:
- Chocolate ganache or cream cheese truffle filling
- White chocolate or candy melts (orange or tinted with food coloring)
- Sprinkles or green icing for decoration
- Optional: mini pretzel sticks for stems
Instructions:
Step 1: Make the Truffle Filling
Prepare your truffle mixture—such as a mixture of cream cheese and crushed cookies, or a smooth chocolate ganache. Chill the mixture until firm enough to roll.
Step 2: Roll into Balls
Scoop small portions of the chilled filling and roll between your hands to form small, even balls. Place them on a parchment-lined sheet and refrigerate to firm up further.
Step 3: Coat with Color
Melt orange candy melts or white chocolate tinted with orange food coloring. Dip each truffle ball into the melted coating using a fork or candy tool, and tap off excess.
Step 4: Decorate Like Pumpkins
Before the coating fully sets, gently press sprinkles around the truffle for texture or insert a mini pretzel stick on top as a “stem.” You can also pipe a tiny bit of green icing as vines or leaves.
Step 5: Chill and Serve
Return the truffles to the refrigerator and let them set completely. Serve on a plate or gift in mini cupcake liners.
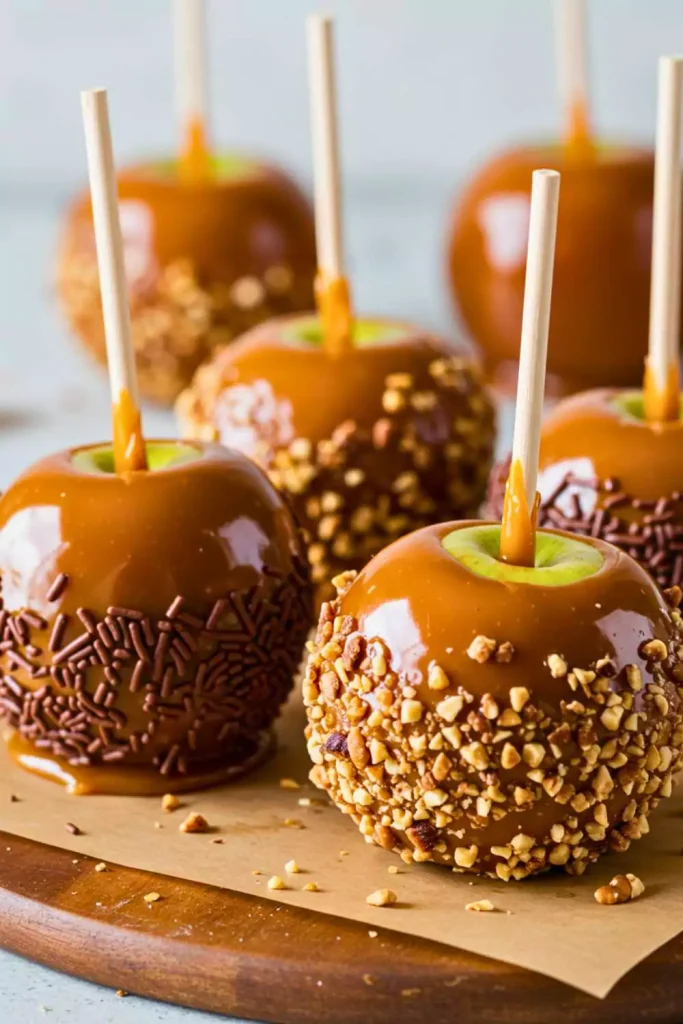
5. Caramel Apples
Caramel apples are a classic autumn favorite and a traditional Halloween treat. The combination of crisp, juicy apples and gooey caramel is comforting and nostalgic.
You can leave them plain or roll them in nuts, chocolate chips, or festive sprinkles.
They’re fun to decorate and create a stunning centerpiece for any Halloween dessert table.
Ingredients:
- Firm apples (Granny Smith or Honeycrisp are ideal)
- Soft caramel candies or homemade caramel
- Popsicle sticks or wooden skewers
- Optional toppings: chopped nuts, mini chocolate chips, crushed cookies, or sprinkles
Instructions:
Step 1: Prepare the Apples
Wash the apples thoroughly and dry them completely. Any moisture will prevent the caramel from sticking. Insert a wooden stick firmly into the top of each apple.
Step 2: Melt Caramel
Unwrap caramel candies and melt them in a saucepan with a little milk or cream, stirring until smooth. If making homemade caramel, cook sugar with butter and cream until it reaches the proper temperature for dipping.
Step 3: Dip the Apples
Holding the sticks, dip each apple into the melted caramel. Tilt and swirl the apple so it gets evenly coated. Let the excess drip back into the pot.
Step 4: Add Toppings
If using toppings, roll the coated apples while still sticky into bowls of chopped nuts, chocolate chips, or sprinkles.
Step 5: Let Them Set
Place the apples on a parchment-lined baking sheet and let them cool completely until the caramel is firm. They’re ready to eat or wrap in cellophane for gifting.
Conclusion
Halloween candy doesn’t have to come straight out of a store-bought bag. With a little creativity and simple ingredients, you can make festive treats that taste amazing and look unforgettable.
These five candy ideas bring together color, flavor, and that spooky-fun Halloween flair.
Whether you’re making them with kids or putting together a gourmet dessert spread, these recipes will add charm and sweetness to your celebrations.