You’re about to make fermentation part of your everyday cooking. These 21 easy fermented food ideas for daily use are practical, delicious, and doable in a home kitchen. Each recipe uses simple tools, realistic times, and step-by-step guidance so you won’t be guessing. Pick a few to start—some take hours, others take weeks—and build your confidence as flavors develop.
Ready to try them? Below are simple, tasty recipes you’ll actually want to eat every day.
21 Smart Easy Fermented Food Ideas For Daily Use Recipes You’ll Actually Try
Ferments add tang, depth, and gut-friendly microbes to meals. These recipes focus on approachable flavors and common ingredients. You’ll see tools and tips included naturally so you can get started with confidence.
1. Classic Sauerkraut
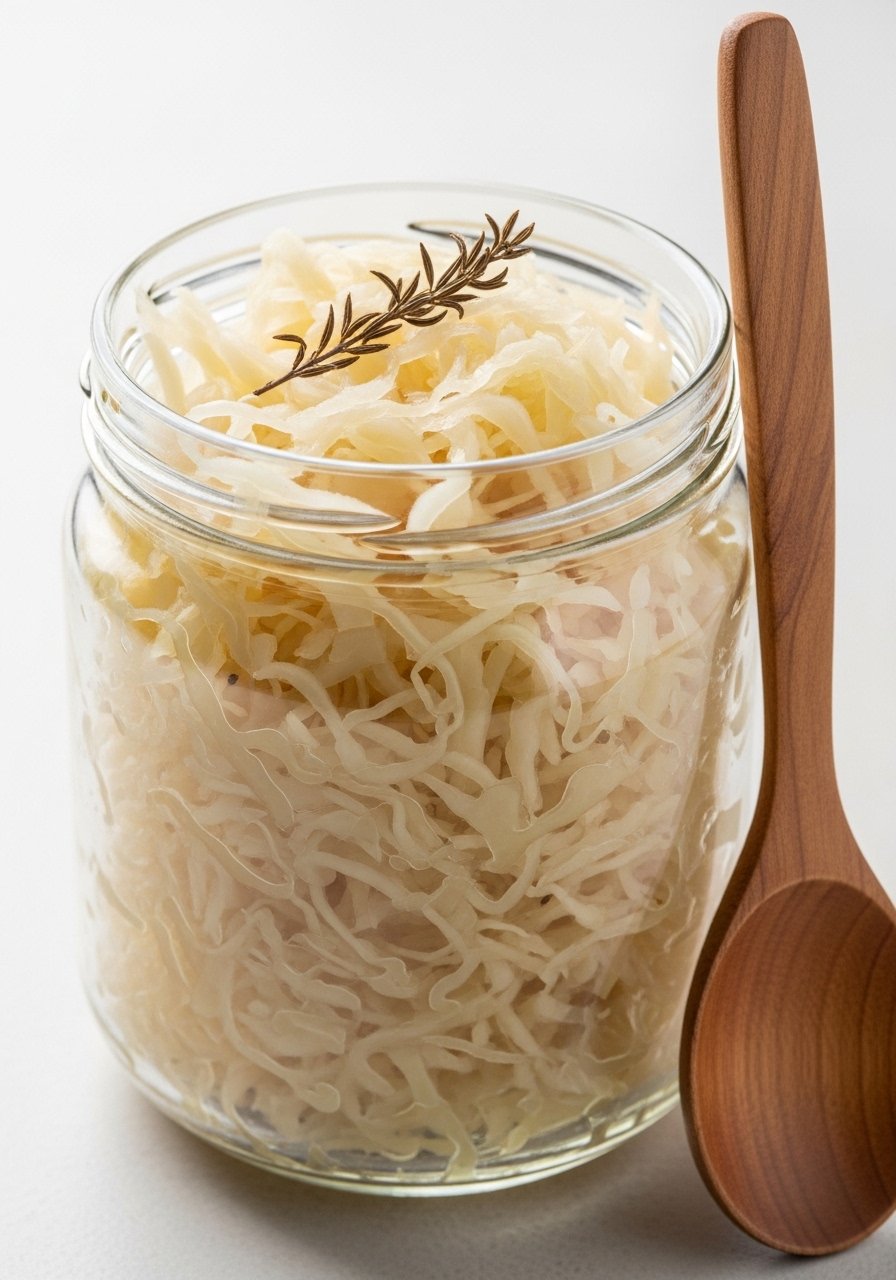
Crunchy, tangy, and slightly sweet. This classic sauerkraut is simple and great on sandwiches, bowls, or as a side. It brightens meals and stores well in the fridge once fermented.
Ingredients
- 1 medium green cabbage (about 2–3 lb), finely shredded
- 1–1.5 tbsp kosher salt (or sea salt), measured by weight for 2% brine
- 1 tsp caraway seeds (optional)
- 1 tbsp grated carrot (optional, for color)
Step-by-Step Instructions
- Prepare Cabbage: Shred cabbage thinly with a knife or mandoline. Place in a large mixing bowl.
- Massage With Salt: Add salt and massage 5–10 minutes until cabbage releases liquid and softens. You should see a brine.
- Pack Into Jar: Pack cabbage tightly into a 1-quart fermentation jar or wide-mouth mason jar. Press down so brine rises above the cabbage.
- Weigh Down & Cover: Place a fermentation weight or smaller jar inside to keep cabbage submerged. Cover with a cloth or airlock lid.
- Ferment: Leave at room temperature (65–75°F) for 5–10 days, tasting after day 5. When tangy to your liking, seal and refrigerate.
2. Quick Refrigerator Kimchi
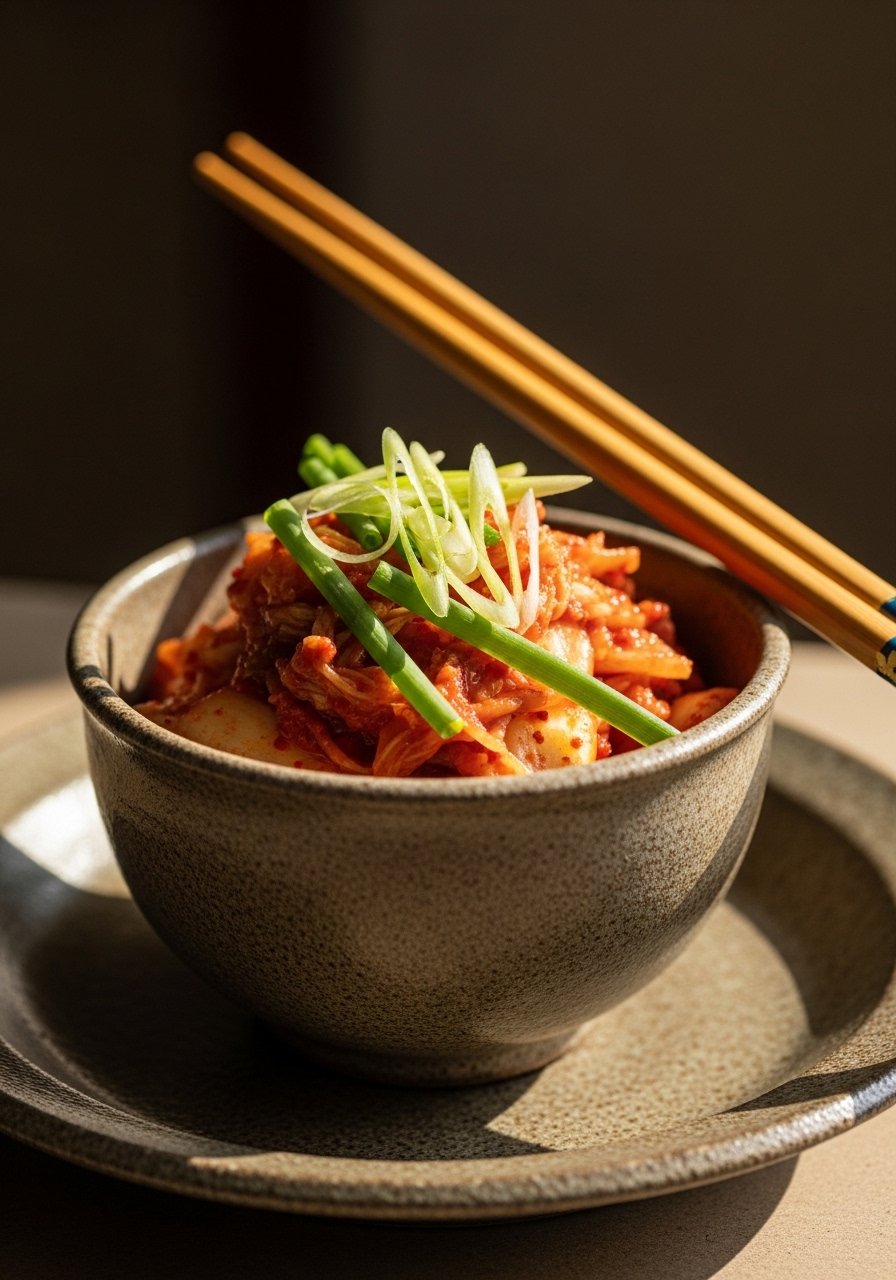
Spicy, garlicky, and bright with ginger. This quick kimchi uses a short ferment that still develops classic umami and heat. Great with rice, eggs, or as a condiment.
Ingredients
- 1 small napa cabbage, chopped (about 2 lb)
- 1/4 cup kosher salt
- 4 cups water (for soaking)
- 3 cloves garlic, minced
- 1 tbsp grated ginger
- 2–3 tbsp gochugaru (Korean red pepper flakes) or to taste
- 2 tbsp fish sauce or tamari for vegan option
- 3 scallions, chopped
- 1 medium carrot, julienned
Step-by-Step Instructions
- Salt Soak: Dissolve salt in 4 cups water and soak chopped cabbage 1–2 hours, tossing occasionally until wilted. Rinse and drain.
- Make Paste: Mix garlic, ginger, gochugaru, fish sauce/tamari into a paste in a bowl.
- Combine Veggies: Toss drained cabbage, carrot, and scallions with the paste until evenly coated.
- Pack & Ferment: Pack into a jar, pressing down to remove air pockets. Leave 1 inch headspace. Cover and ferment at room temp 24–48 hours for a quick tang, then refrigerate.
3. Homemade Yogurt
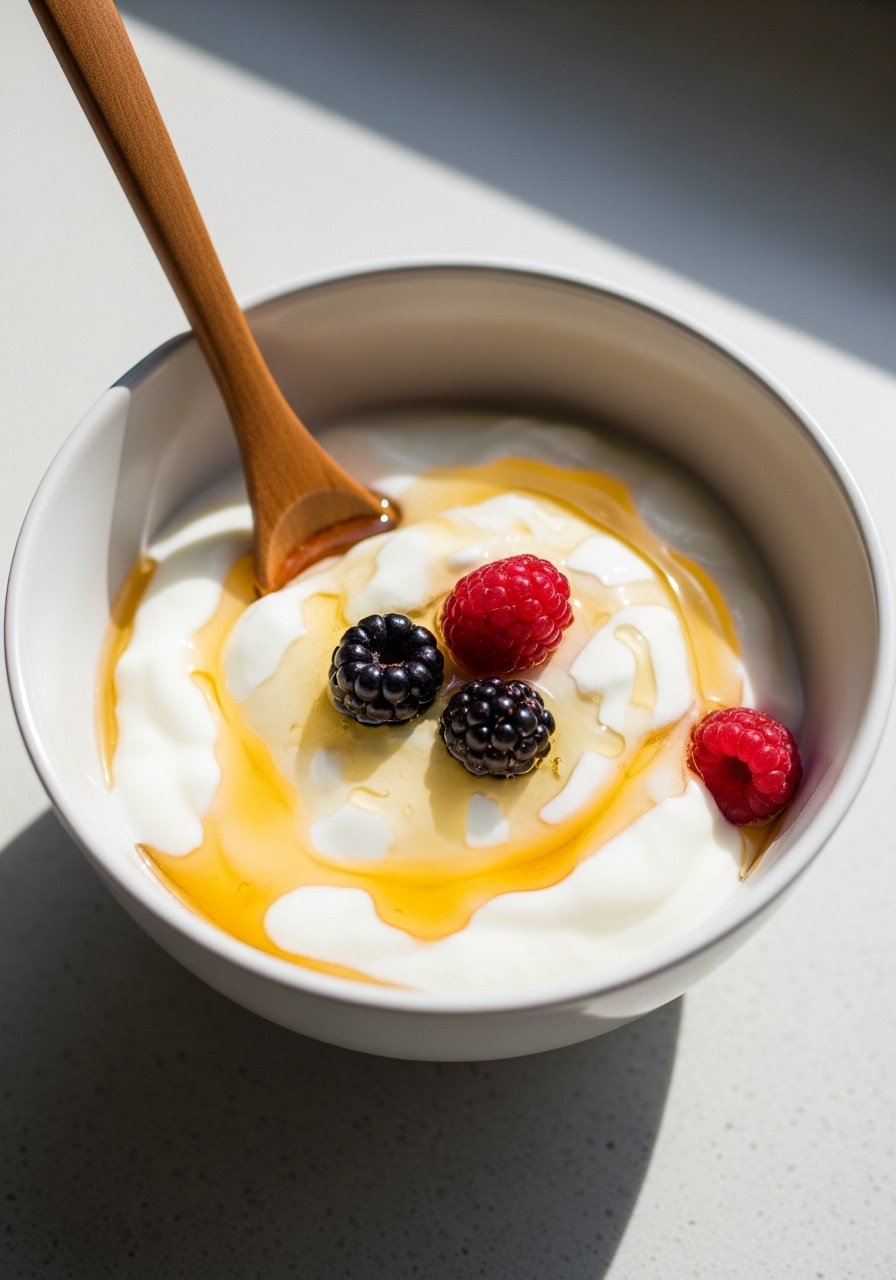
Creamy and tangy yogurt you can flavor anyway you like. This stovetop-and-incubate method yields reliable, spoonable results and saves money compared to store-bought yogurt.
Ingredients
- 1 quart whole milk (or 2% for lighter yogurt)
- 2 tbsp plain yogurt with live cultures (store-bought or leftover batch)
Step-by-Step Instructions
- Heat Milk: Heat milk in a saucepan to 180°F (visual: small bubbles around edge). Stir occasionally.
- Cool Milk: Remove from heat and cool to 110°F (warm to the touch). Use a thermometer for accuracy.
- Add Starter: Whisk in 2 tbsp live-culture yogurt until smooth.
- Incubate: Pour into jars or a yogurt maker and keep at 105–112°F for 6–8 hours (use a warm oven with light on, cooler overnight, or a yogurt maker).
- Chill: Refrigerate 2–4 hours before serving to firm up.
4. Labneh (Strained Yogurt Cheese)
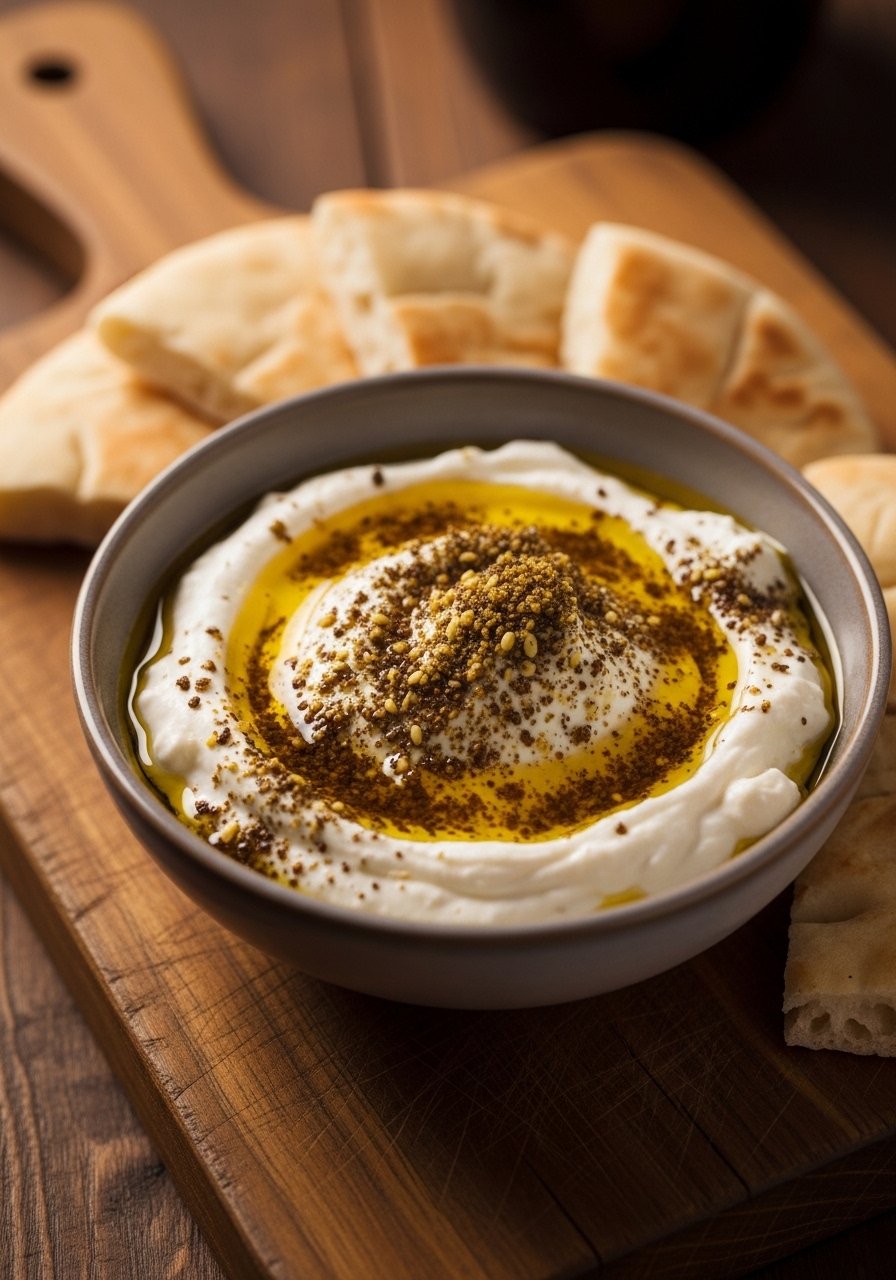
Thick, tangy, and spreadable. Labneh is basically strained yogurt that makes a great dip, spread, or base for toppings like olive oil and herbs.
Ingredients
- 2 cups plain yogurt (whole-milk for richness)
- 1/2 tsp salt
- Olive oil and za’atar for serving
Step-by-Step Instructions
- Season Yogurt: Stir salt into yogurt until blended.
- Line & Pour: Line a fine sieve with cheesecloth and set over a bowl. Pour yogurt into cheesecloth.
- Drain: Tie corners and hang or rest in fridge for 12–24 hours until thick and creamy.
- Serve: Transfer to a bowl, drizzle olive oil, sprinkle za’atar, and serve.
5. Water Kefir
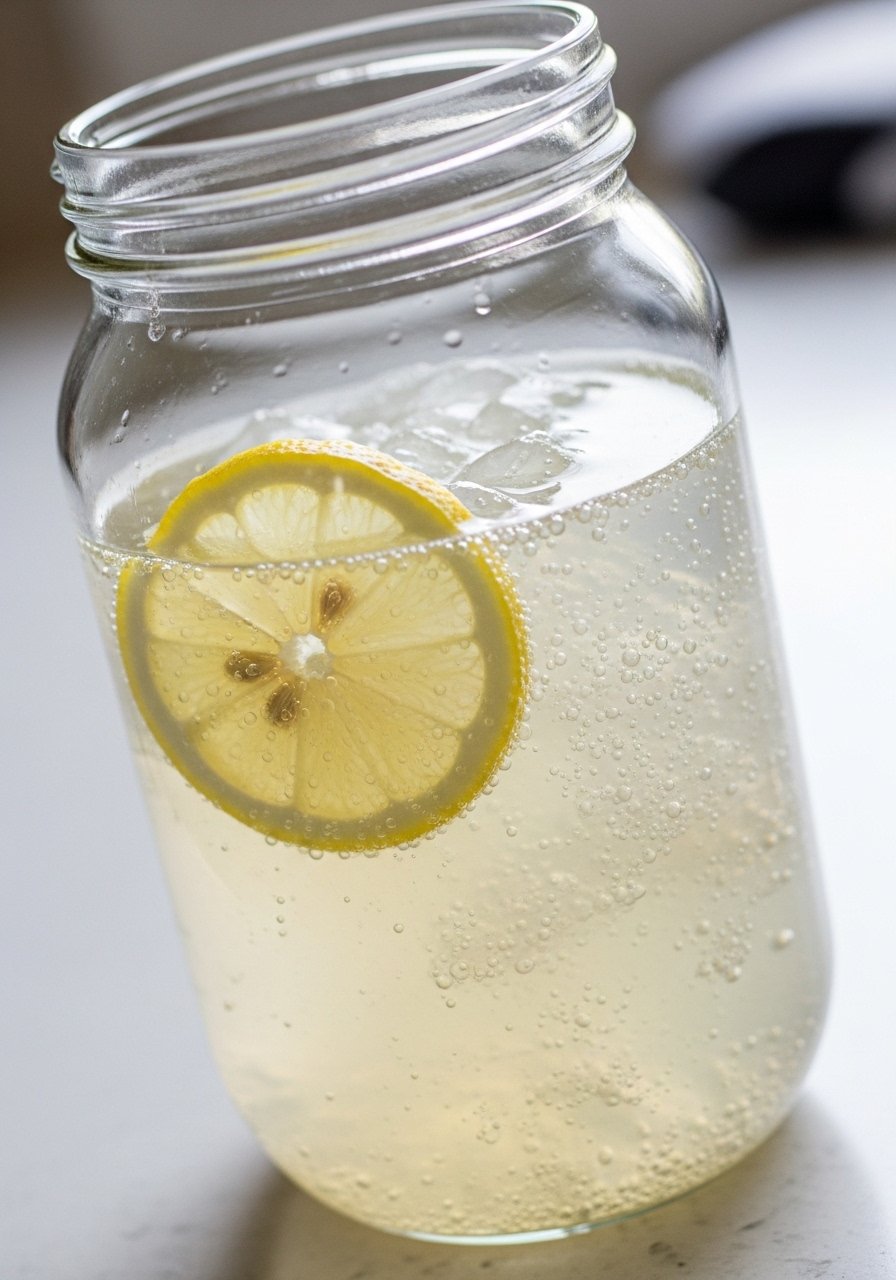
Light, mildly sweet, and effervescent. Water kefir is a probiotic beverage made with grains and sugar water. Flavor with fruit or citrus after the primary ferment.
Ingredients
- 3 tbsp water kefir grains
- 4 cups filtered water
- 1/4 cup cane sugar
- Optional: 1 slice lemon, a few dried figs, or berries for flavor
Step-by-Step Instructions
- Dissolve Sugar: Stir sugar into warm filtered water until dissolved, cool to room temp.
- Add Grains: Add water kefir grains and a slice of lemon or dried fig to a jar.
- Primary Ferment: Cover loosely and ferment at room temp 24–48 hours until slightly tangy and bubbly.
- Second Ferment (Optional): Strain grains, bottle liquid with fruit for 24–48 hours to carbonate, then refrigerate. Save grains for next batch.
6. Simple Kombucha
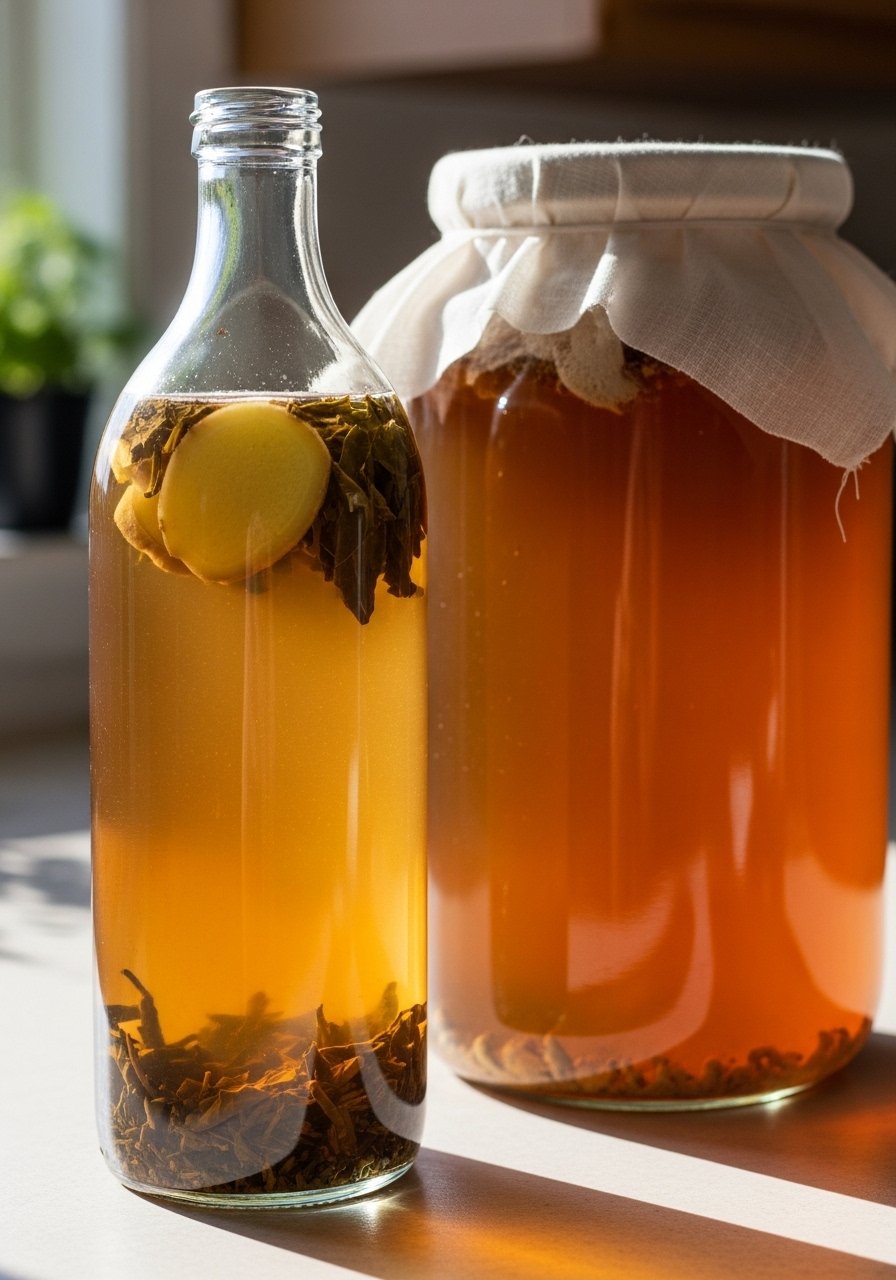
Tangy, lightly fizzy, and full of character. Kombucha needs a SCOBY and tea base. This recipe yields a mild, everyday kombucha you can flavor later.
Ingredients
- 1 SCOBY and 1 cup starter kombucha (from previous batch or store)
- 8 cups water
- 4 bags black or green tea
- 1 cup sugar
Step-by-Step Instructions
- Make Sweet Tea: Boil water, steep tea bags 10 minutes, stir in sugar until dissolved. Cool to room temp.
- Add SCOBY: Pour cooled tea into a wide-mouth jar, add starter kombucha and SCOBY.
- Cover & Ferment: Cover with breathable cloth, secure with a rubber band, ferment 7–14 days at 70–80°F. Taste after 7 days.
- Bottle & Flavor: Remove SCOBY, bottle kombucha, add flavorings for a 2–3 day secondary ferment if desired, then refrigerate.
7. Easy Sourdough Starter
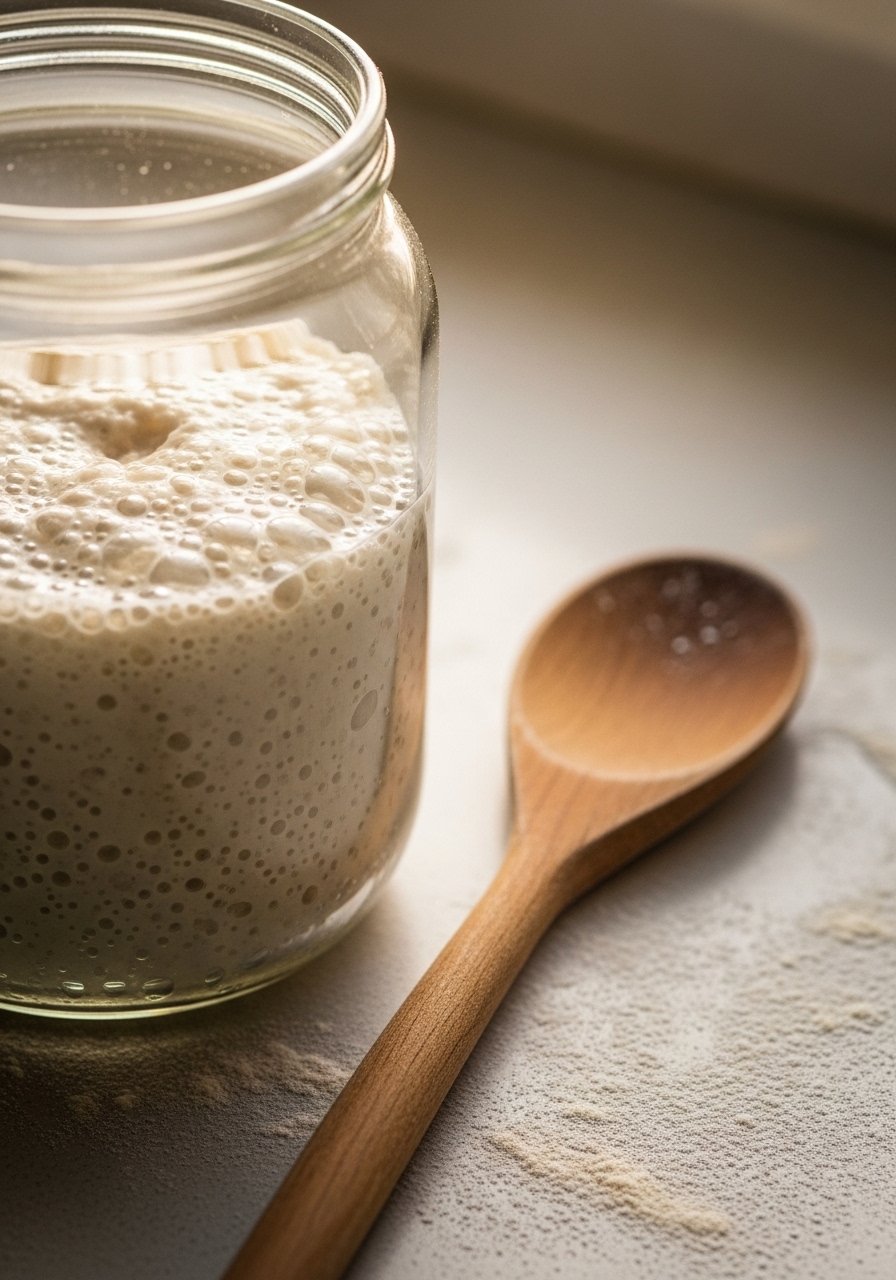
A resilient starter full of wild yeast and flavor. Feed it regularly and you’ll have a base for bread, pancakes, and more.
Ingredients
- 1/2 cup whole wheat or all-purpose flour
- 1/2 cup lukewarm water
Step-by-Step Instructions
- Day 1 Mix: Stir flour and water in a jar until smooth. Cover loosely.
- Feed Daily: Each day discard half, then add 1/2 cup flour and 1/2 cup water. Stir and cover.
- Watch For Activity: Bubbles and doubling in 5–7 days mean your starter is ready.
- Maintain: Keep at room temp with daily feeds, or refrigerate and feed weekly.
8. Sourdough Discard Pancakes

Light, slightly tangy pancakes that use sourdough discard. Quick to make and perfect for breakfast or brunch.
Ingredients
- 1 cup sourdough discard (unfed)
- 1 cup milk
- 1 egg
- 1 cup flour
- 1 tbsp sugar
- 1 tsp baking soda
- Pinch of salt
- Butter or oil for pan
Step-by-Step Instructions
- Mix Wet Ingredients: Whisk discard, milk, and egg in a bowl until smooth.
- Add Dry Ingredients: Stir in flour, sugar, baking soda, and salt. Let rest 10 minutes.
- Cook: Heat skillet over medium, add butter. Pour 1/4-cup batter per pancake, cook 2–3 minutes per side until bubbles form and edges set.
- Serve: Stack and serve warm with your favorite toppings.
9. Lacto-Fermented Pickles (Crisp Dill)
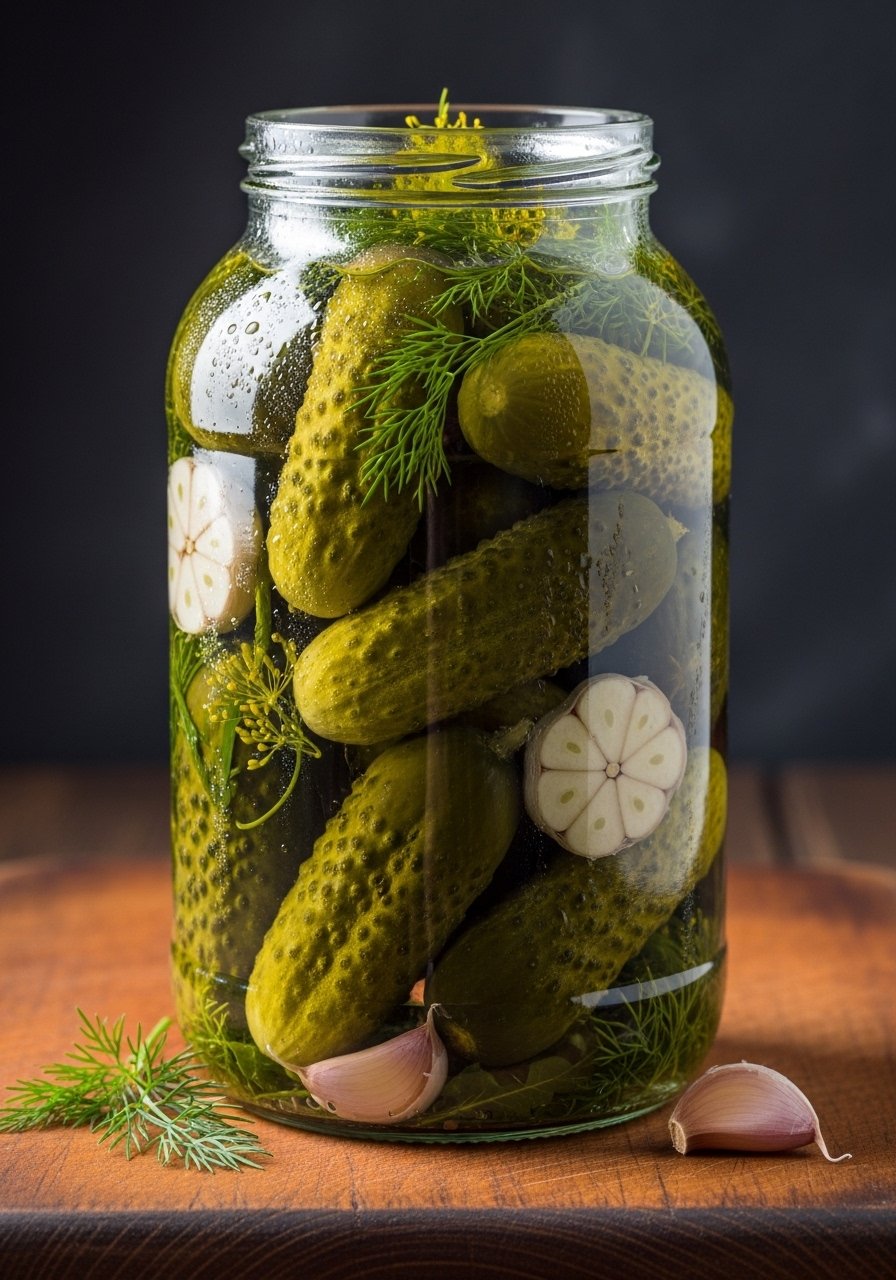
Crisp, garlicky, and tangy pickles made the traditional way. Keep them submerged in brine for safe fermentation and crunchy texture.
Ingredients
- 1 lb small pickling cucumbers, washed
- 3 cloves garlic, smashed
- 2–3 sprigs fresh dill
- 1 tbsp kosher salt per 2 cups water (roughly 2–3% brine)
- Water to fill jar
Step-by-Step Instructions
- Prep Brine: Dissolve salt in water to make a brine.
- Pack Jar: Place garlic and dill at bottom, pack cucumbers upright without crowding.
- Add Brine & Weight Down: Pour brine to cover cucumbers, leave 1 inch headspace. Use a weight to keep cucumbers submerged.
- Ferment: Cover loosely and ferment 5–14 days at room temp. Taste for desired sourness, then refrigerate.
10. Quick Pickled Red Onions

Sharp, sweet, and bright pink. These quick pickled onions are technically a short fridge ferment and add instant tang to tacos and salads.
Ingredients
- 1 large red onion, thinly sliced
- 1/2 cup apple cider vinegar
- 1/2 cup water
- 1 tbsp sugar
- 1 tsp salt
Step-by-Step Instructions
- Make Brine: Warm vinegar, water, sugar, and salt until dissolved. Cool slightly.
- Pack Onions: Place sliced onions in a jar and pour brine over until covered.
- Rest: Let cool to room temp, then refrigerate at least 1 hour. For deeper flavor, refrigerate overnight.
- Use: Keeps up to 2 weeks refrigerated.
11. Fermented Carrot-Ginger Sticks
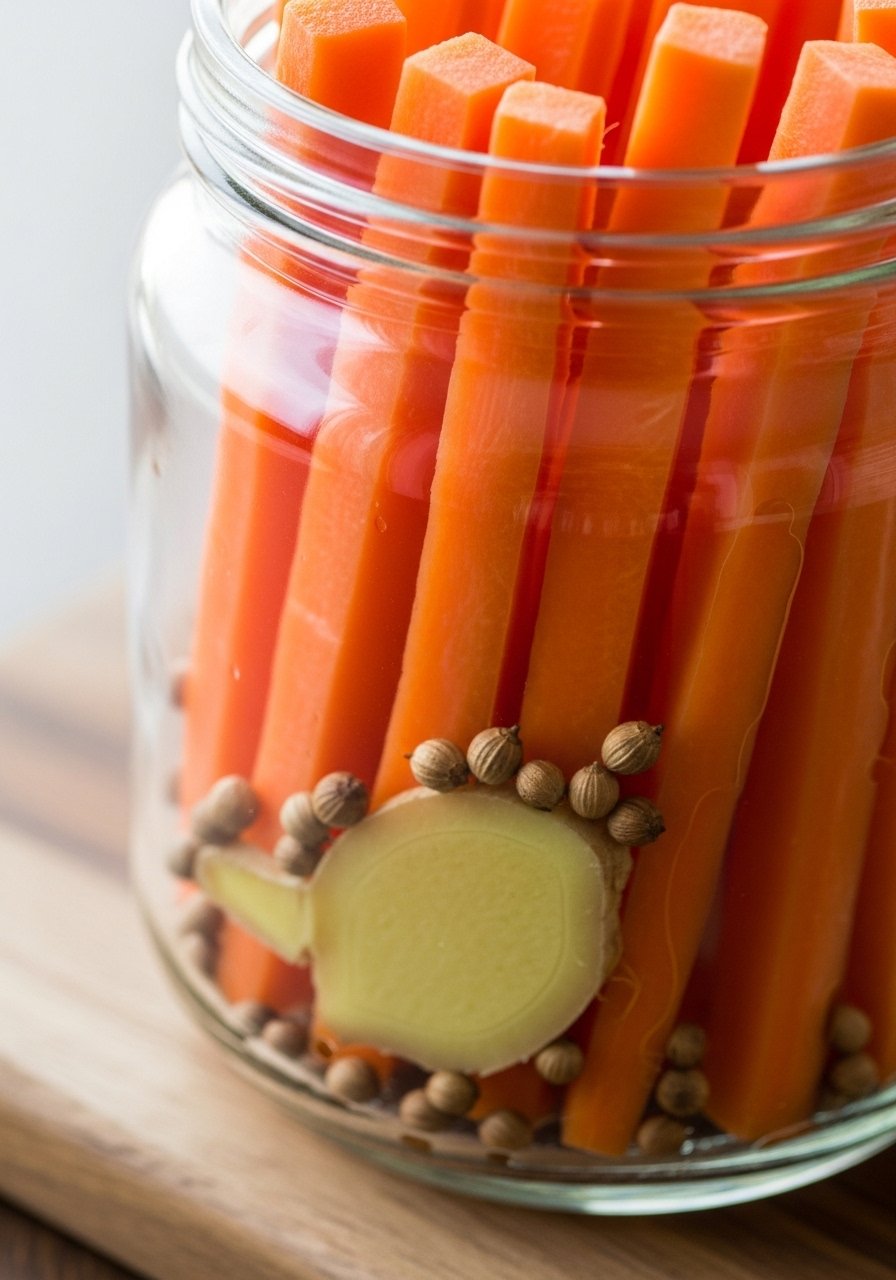
Crunchy, spicy, and lightly tangy. Carrot-ginger sticks make a lively snack or salad topper and ferment quickly for accessible flavor.
Ingredients
- 1 lb carrots, cut into sticks
- 1-inch piece fresh ginger, thinly sliced
- 1 tbsp kosher salt per 2 cups water (brine)
- Optional: 1 tsp coriander seeds
Step-by-Step Instructions
- Prepare Brine: Dissolve salt in water. Cool.
- Pack Jars: Place carrots, ginger, and coriander seeds in jars.
- Add Brine & Weight: Pour brine to cover, keep carrots submerged with a weight.
- Ferment: Leave at room temp 3–7 days until slightly tangy, then refrigerate.
12. Beet Kvass
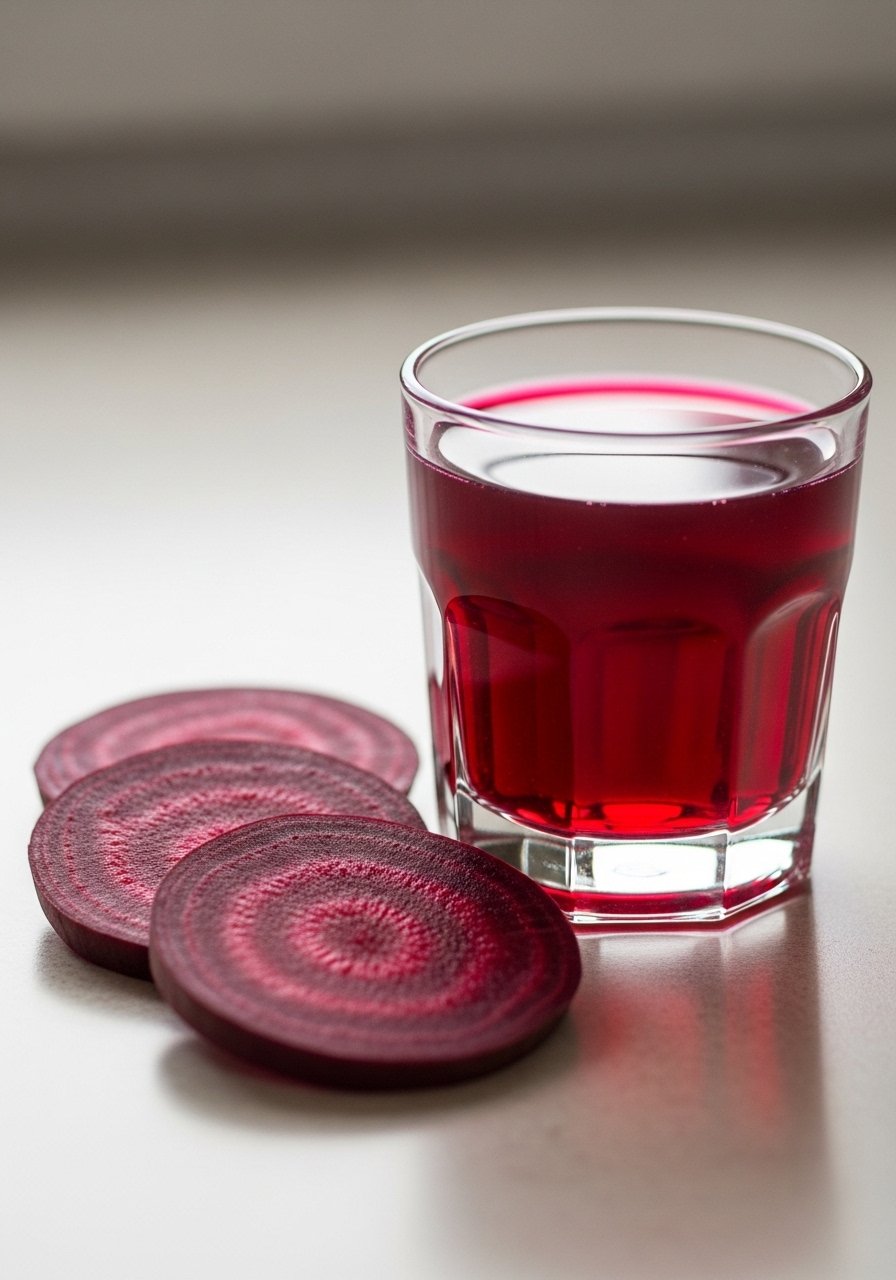
Earthy, slightly salty, and restorative. Beet kvass is a traditional tonic with an appetizing tang—simple to make and great as a digestive sip.
Ingredients
- 2 medium beets, peeled and chopped
- 1 tbsp sea salt
- Filtered water to cover
Step-by-Step Instructions
- Pack Beets: Place chopped beets and salt in a jar and cover with water.
- Cover & Ferment: Cover loosely and ferment at room temp 3–7 days until tangy and slightly fizzy.
- Strain & Store: Strain liquid into a bottle and refrigerate. Keep beets for a second ferment if desired.
13. Fermented Salsa Roja
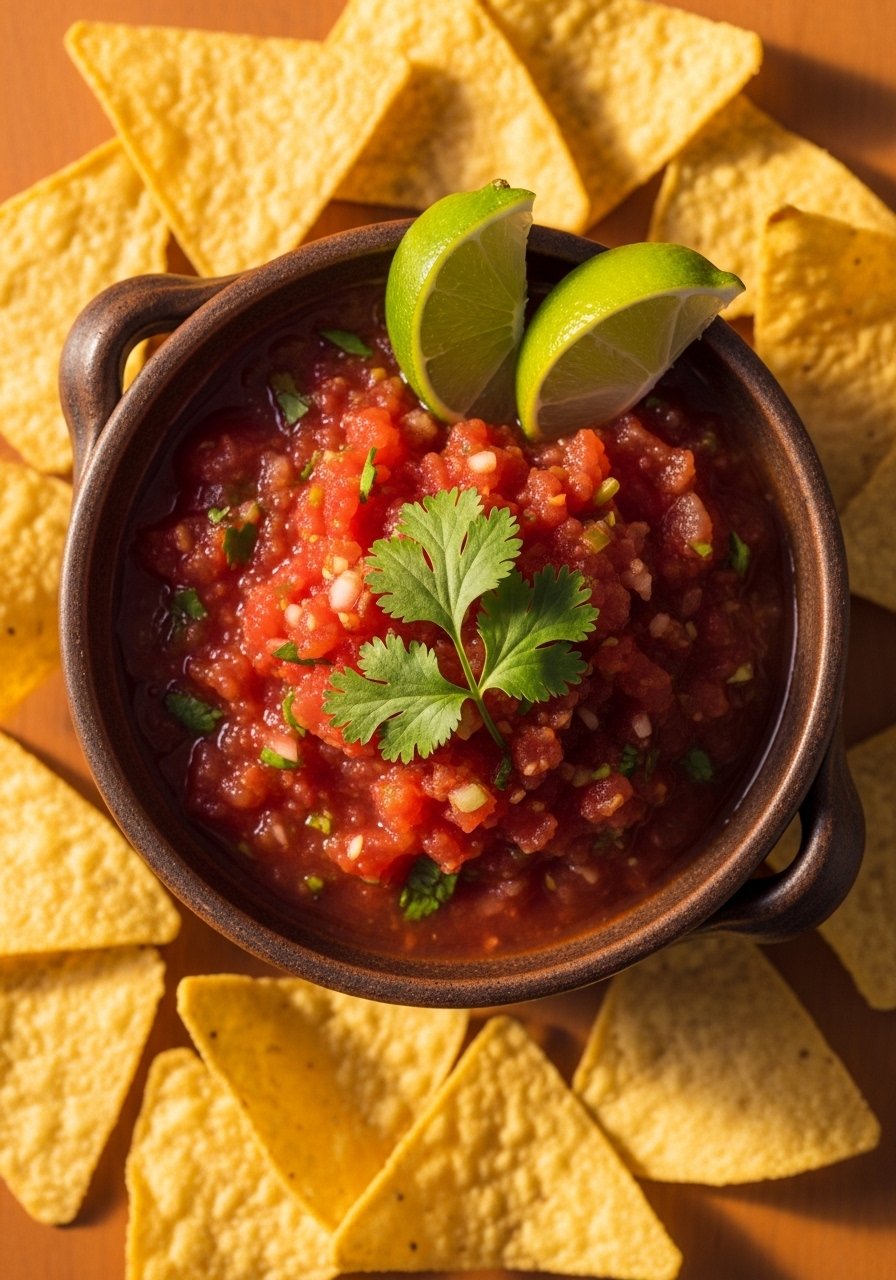
Smoky, tangy, and bright. Fermenting this salsa softens acidity and builds a deep, savory profile—excellent with chips or eggs.
Ingredients
- 4 ripe tomatoes, chopped
- 1 small onion, chopped
- 2 cloves garlic
- 1 jalapeño or to taste
- 1 tsp salt
- 1/4 cup cilantro, chopped
- Juice of 1 lime (post-ferment)
Step-by-Step Instructions
- Blend Base: Pulse tomatoes, onion, garlic, jalapeño, and salt to a chunky consistency in a food processor.
- Pack & Cover: Pour into a jar, leaving 1 inch headspace. Cover loosely.
- Ferment: Let sit at room temp 1–3 days, tasting daily until balanced.
- Finish: Stir in cilantro and lime juice, then refrigerate.
14. Fermented Hot Sauce
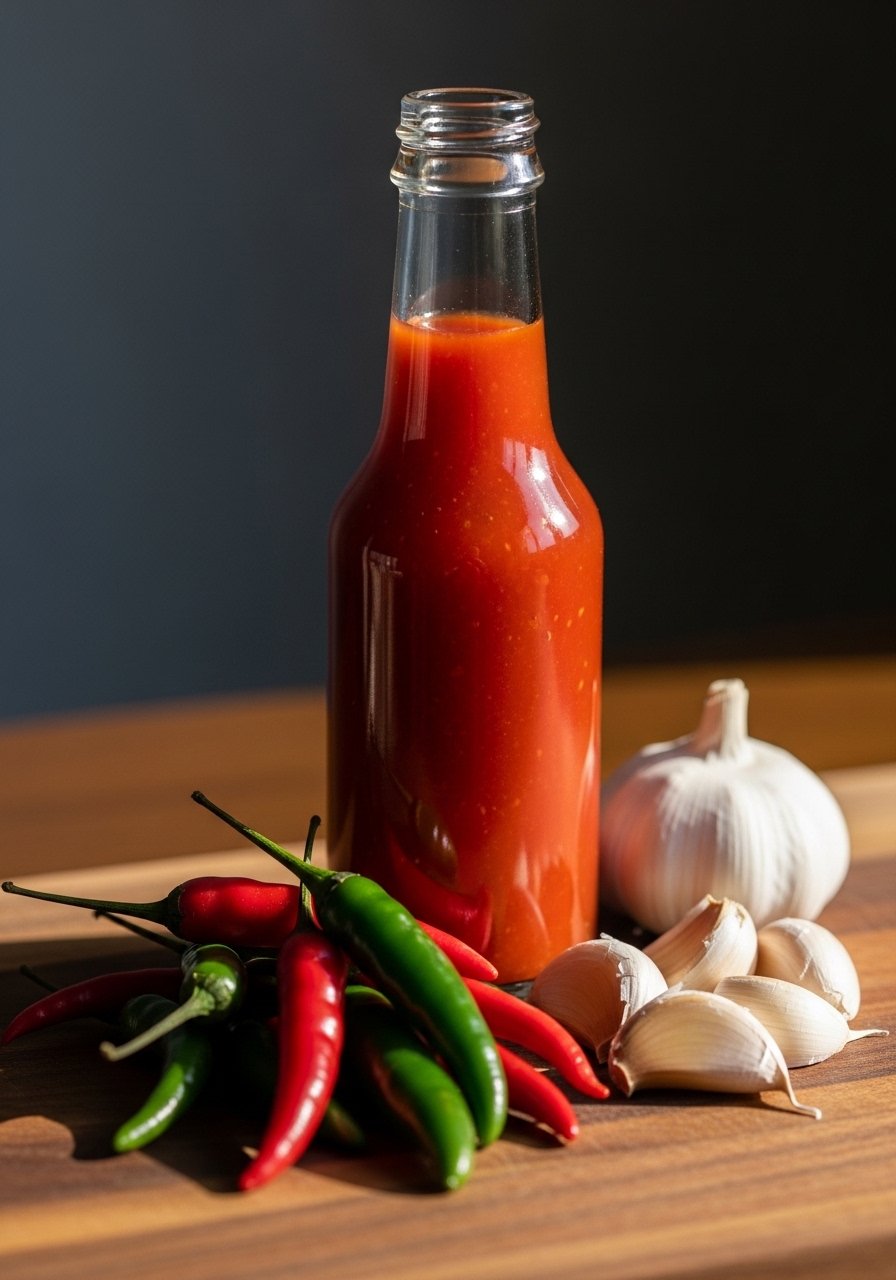
Complex, tangy, and customizable heat. A simple pepper ferment yields a balanced hot sauce you can blend and bottle for weekly use.
Ingredients
- 1 lb mixed hot peppers, chopped (keep seeds for heat)
- 4 cloves garlic
- 1 tbsp sea salt
- 1/2 cup water
Step-by-Step Instructions
- Salt & Mash: Mash peppers, garlic, and salt in a bowl until a bit juicy.
- Pack Jar: Pack mixture into a jar and add a splash of water if needed to cover.
- Ferment: Cover loosely and ferment 5–14 days, tasting until lively and tangy.
- Blend & Bottle: Blend to a smooth sauce with a little vinegar if desired, then strain and refrigerate.
15. Fermented Mustard
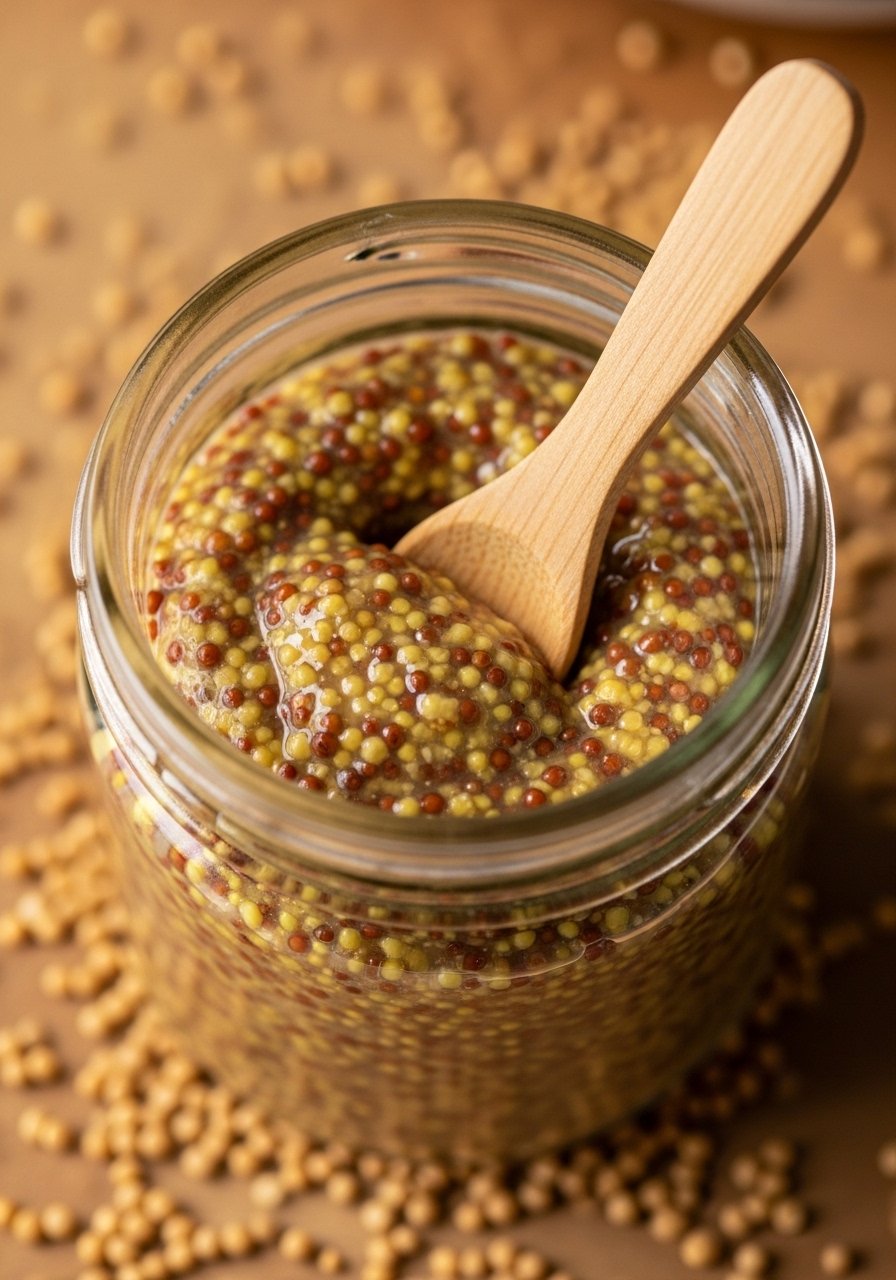
Tangy, mellow, and full of depth. Fermenting mustard seeds softens bitterness and develops savory, complex flavors ideal for sandwiches and dressings.
Ingredients
- 1/2 cup yellow mustard seeds
- 1/2 cup apple cider vinegar
- 1/4 cup water
- 1 tsp salt
- 1 tbsp honey or maple syrup (optional)
Step-by-Step Instructions
- Soak Seeds: Combine seeds, vinegar, water, and salt in a jar. Cover and let soak 12–24 hours to soften.
- Ferment: Cover with cloth and ferment at room temp 2–5 days for tang development.
- Blend: Blend to desired texture, sweeten if you like, then refrigerate.
16. Dilly Relish (Fermented)

Sweet-and-sour with dill and crunch. This fermented relish elevates hot dogs, burgers, and salads with lively tang and texture.
Ingredients
- 2 cups finely chopped pickling cucumbers
- 1/2 cup finely chopped onion
- 1 tbsp dill seeds or fresh dill
- 1 tbsp kosher salt per 2 cups water brine
Step-by-Step Instructions
- Mix Veggies: Combine cucumbers, onion, and dill in a bowl.
- Pack & Add Brine: Pack into jar and pour brine to cover.
- Ferment: Keep submerged and ferment 3–7 days until tangy, then refrigerate.
17. Quick Brined Olives
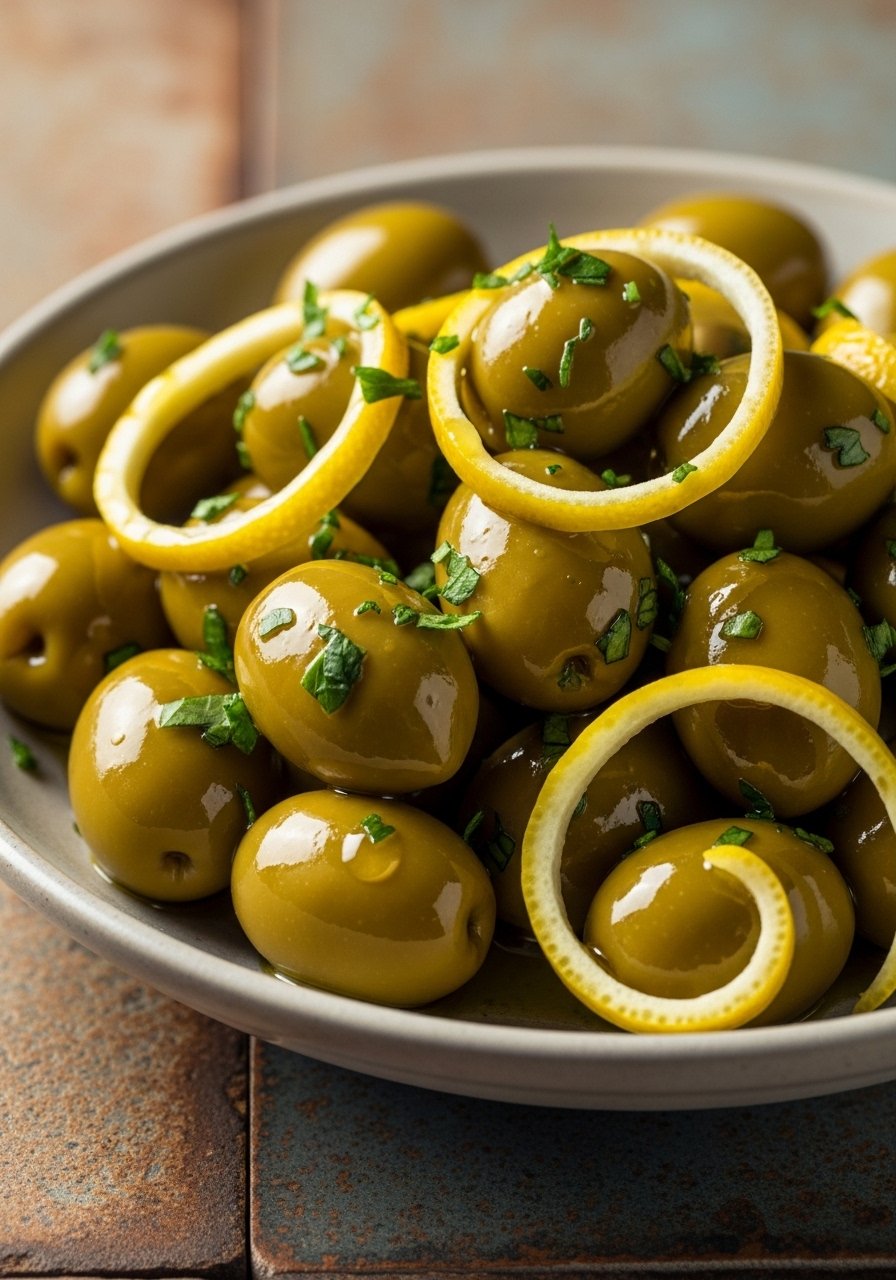
Brined and mellow, these olives are ready in a few weeks and customizable with herbs and citrus. A simple brine turns fresh olives into a table staple.
Ingredients
- 1 lb fresh green olives, slit or pierced
- 1/2 cup salt per quart water (approx. strong brine)
- 1 lemon, sliced
- 2 cloves garlic, crushed
- Optional herbs: rosemary, oregano
Step-by-Step Instructions
- Rinse & Slit: Rinse olives and make a slit in each to release bitterness.
- Make Brine: Dissolve salt in warm water. Cool.
- Pack Jar: Place olives, lemon, garlic, and herbs in jar; pour brine to cover.
- Ferment: Let sit in a cool dark place 2–4 weeks, tasting occasionally. Move to fridge when ready.
18. Cashew Yogurt (Non-Dairy)
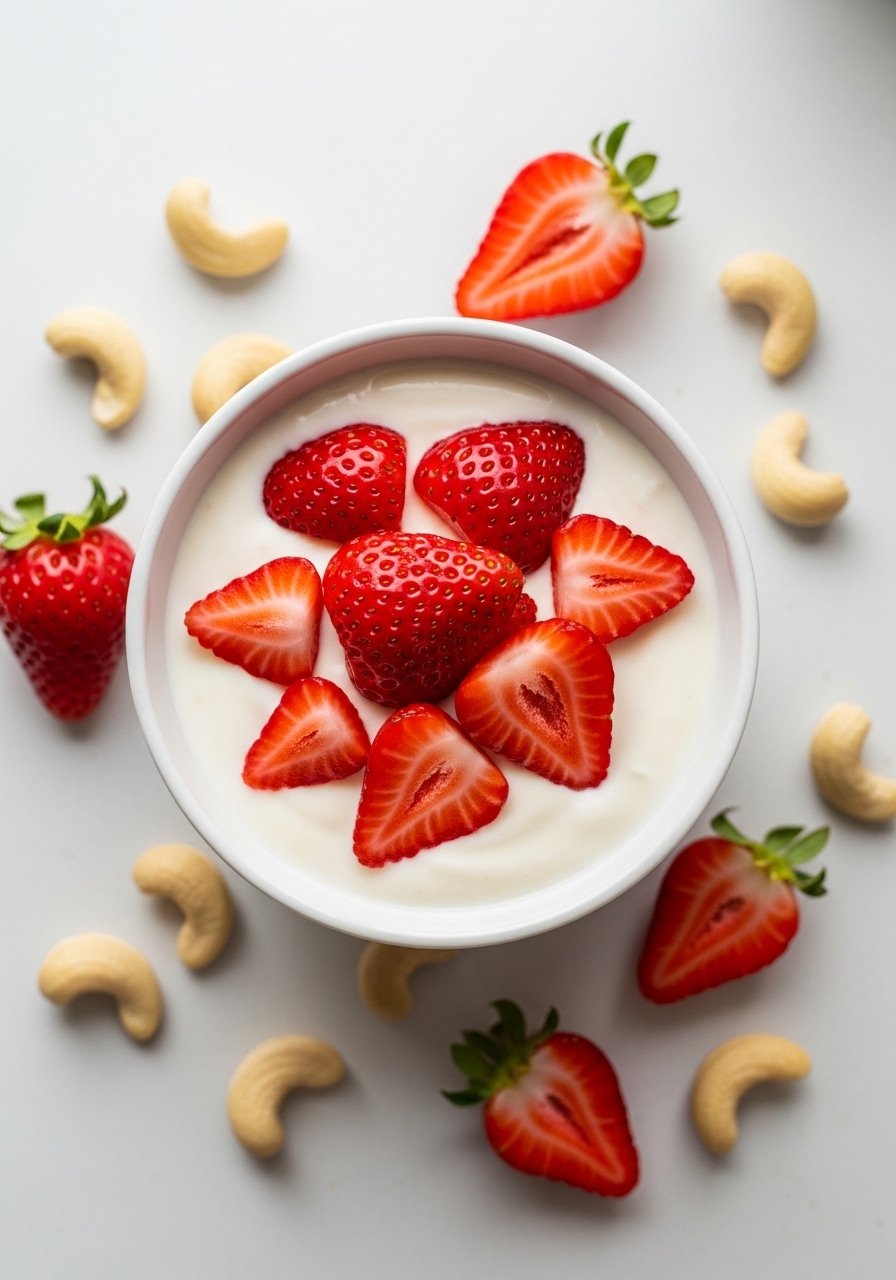
Silky, tangy, and dairy-free. Cashew yogurt cultures beautifully and makes a creamy base for breakfast bowls, sauces, or savory dips.
Ingredients
- 1 1/2 cups raw cashews, soaked 4 hours and drained
- 1 cup water
- 1–2 probiotic capsules or 2 tbsp dairy-free yogurt with live cultures
- 1/4 tsp salt
Step-by-Step Instructions
- Blend Cashews: Blend soaked cashews with water and salt until very smooth.
- Add Cultures: Stir in probiotics or dairy-free yogurt once cooled to warm.
- Incubate: Transfer to a jar and keep at 100–110°F for 8–12 hours to culture (use warm oven light or a yogurt maker).
- Chill & Use: Refrigerate to thicken and enjoy within 7–10 days.
19. Fermented Garlic Honey
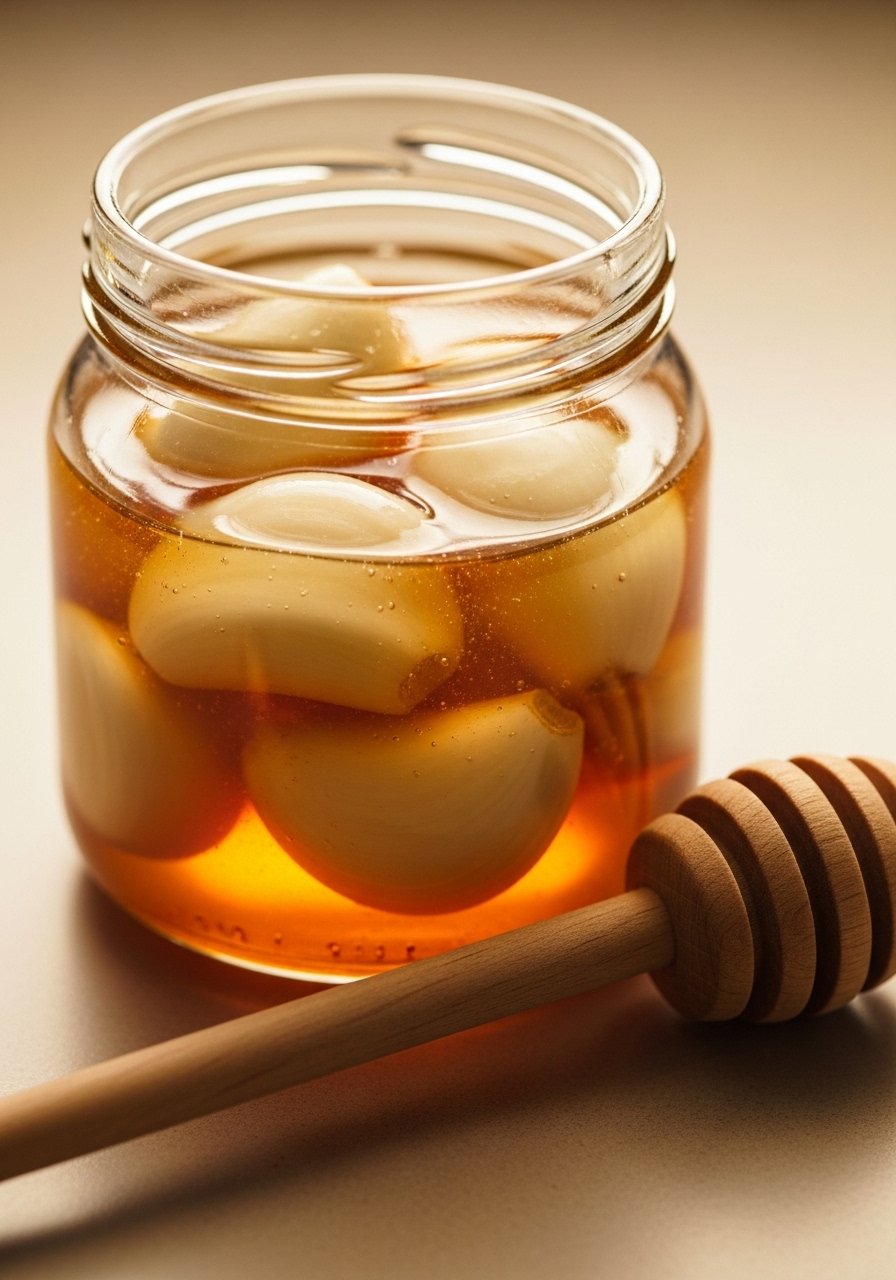
Sweet, mellow, and savory. Fermented garlic honey mellows garlic’s bite and creates a syrupy condiment for toast, cheese, and roasted veggies.
Ingredients
- 1 cup raw honey (ensure local and unpasteurized if possible)
- 4–6 peeled garlic cloves
Step-by-Step Instructions
- Combine: Place garlic cloves in a jar and cover with honey, leaving 1/2 inch headspace.
- Ferment: Loosen the lid and keep at room temp 1–2 weeks; honey may bubble lightly. Burp daily.
- Store: When garlic has softened and flavors meld, tighten lid and refrigerate or keep in cool pantry.
20. Radish Kimchi (Kkakdugi-Style)
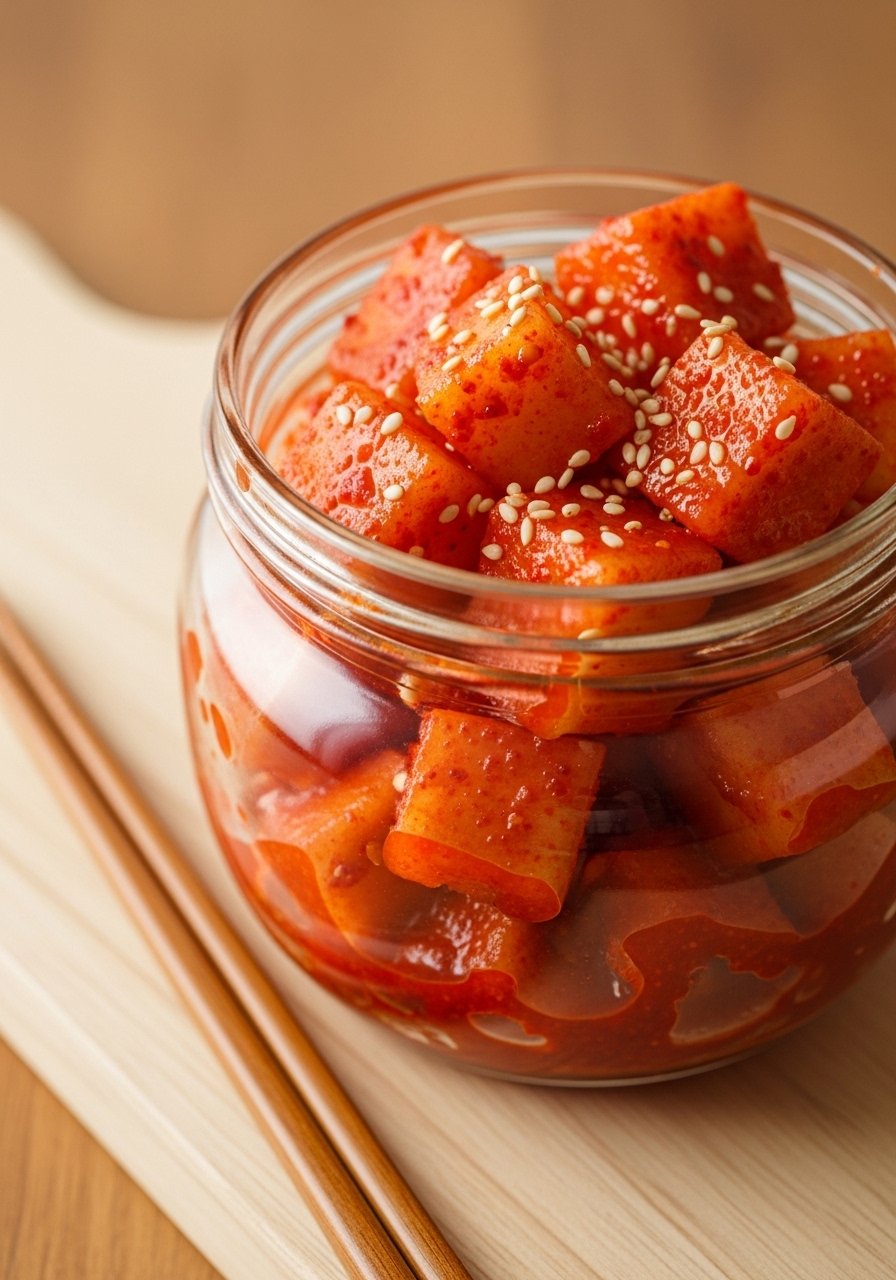
Crunchy, spicy, and refreshing. This radish kimchi has a crisp bite and is a great accompaniment to rice bowls and grilled proteins.
Ingredients
- 1 lb Korean radish or daikon, cut into 1/2-inch cubes
- 1 tbsp salt
- 1 tbsp fish sauce or tamari
- 1–2 tbsp gochugaru
- 1 tsp sugar
- 1 clove garlic, minced
- 1 tsp grated ginger
Step-by-Step Instructions
- Salt Radish: Toss radish cubes with salt and let sit 30–60 minutes, then drain excess liquid.
- Make Paste: Combine fish sauce/tamari, gochugaru, sugar, garlic, and ginger.
- Mix & Pack: Toss paste with radish cubes until coated and pack into a jar.
- Ferment: Leave at room temp 2–5 days to develop tang, then refrigerate.
21. Apple Cider Vinegar From Scraps
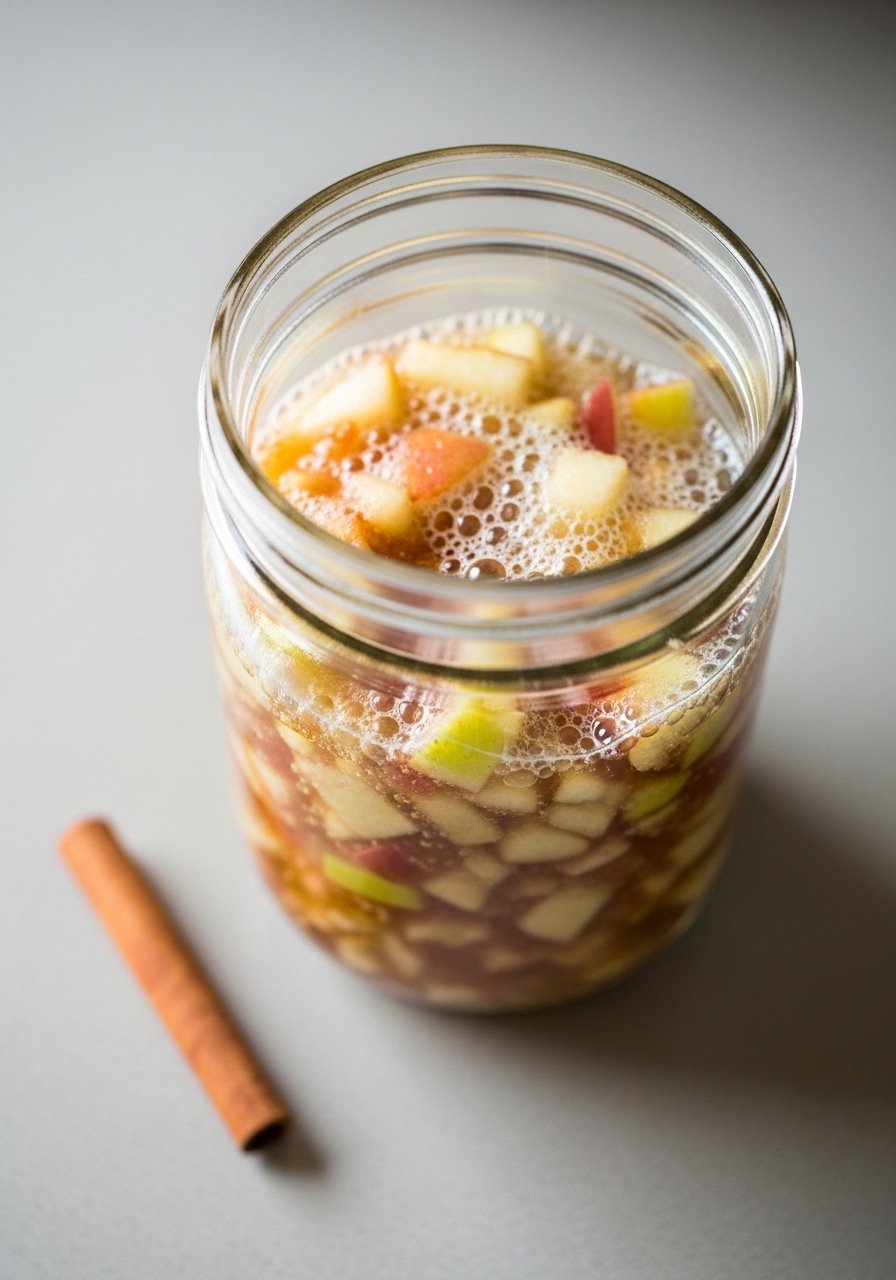
Sustainable and tart. Turn apple peels and cores into homemade apple cider vinegar. It takes time but gives a satisfying, usable pantry staple.
Ingredients
- Apple peels and cores (from 4–6 apples)
- 2 tbsp sugar per cup of water
- Filtered water to cover
Step-by-Step Instructions
- Fill Jar: Place apple scraps in a jar and cover with water and sugar (about 1–2 tbsp sugar per cup water).
- Cover & Ferment: Cover with a cloth and ferment at room temp 2–3 weeks, stirring every few days.
- Strain & Continue: Strain out solids, return liquid to jar to ferment another 3–6 weeks until sharp and acidic. Bottle and store.
Final Thoughts
You don’t need fancy gear to start fermenting. A few jars, weights, and patience will take you far. Try one or two recipes first and see what flavors you love.
Fermentation is forgiving and creative. Enjoy experimenting, and let these everyday ferments make your meals brighter and more interesting.
Helpful tool if you want a gentle, reliable start: Glass Fermentation Jar Set — good jars and lids make fermenting easier and neater.