Frosting a cake smoothly is one of the most important skills for bakers, whether you’re decorating a birthday cake, a celebration dessert, or creating content for your food blog.
While it may seem challenging, achieving a perfectly smooth finish is completely doable with the right tools, techniques, and a bit of patience.
This guide breaks down everything you need to know to frost a cake like a pro.
1. Start With a Properly Cooled Cake
Before you even think about frosting, make sure your cake layers are completely cool. Warm cake will cause buttercream to melt and slide, creating an uneven surface.
Tips:
- Allow cakes to cool in the pan for 10–15 minutes, then transfer to a cooling rack.
- For the smoothest results, wrap and refrigerate cakes for at least 1 hour; chilled cakes are firmer and easier to frost.
- If the cake has domes, level them using a serrated knife.
2. Choose the Right Frosting Consistency
The texture of your frosting affects how smoothly it spreads. Too stiff, and it will tear the cake; too soft, and it won’t hold shape.
What You Want:
- Buttercream that spreads easily but still holds peaks.
- If it’s too thick: add 1–2 teaspoons of milk.
- If it’s too thin: add 1–2 tablespoons of powdered sugar.
3. Prep the Cake With a Crumb Coat
A crumb coat is a thin layer of frosting that traps crumbs and gives you a clean base for the final layer.
How to Apply a Crumb Coat:
- Place the first cake layer on a turntable.
- Spread a layer of frosting over the top, then add the next layer.
- Apply a thin layer of frosting over the entire cake—just enough to seal crumbs.
- Chill the cake for 20–30 minutes so the crumb coat sets.
This step is essential for achieving a smooth, polished finish later.
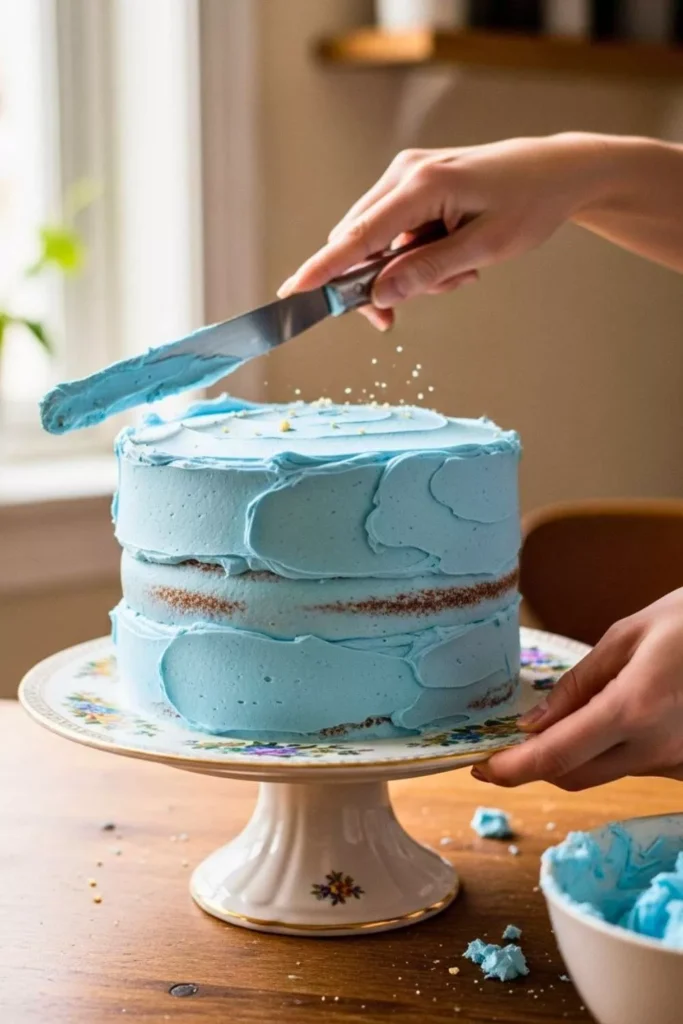
4. Use the Right Tools for Smoothing
Professional results come from using the correct tools.
Must-Have Tools:
- Offset spatula for spreading.
- Bench scraper for smoothing the sides.
- Turntable for spinning the cake while smoothing.
- Piping bag (optional) to apply frosting more evenly.
A turntable and bench scraper make the biggest difference in achieving a flawless, smooth surface.
5. Apply the Final Layer of Frosting
Once your crumb coat is chilled, it’s time for the main layer.
Step-by-Step:
- Add frosting on top and spread it outward with the offset spatula.
- Push extra frosting around the sides, applying it generously.
- Hold your bench scraper at a slight angle against the cake.
- Spin the turntable slowly while keeping the scraper steady.
This will remove excess frosting and create a clean, smooth surface. - Fill in gaps as needed and smooth again.
Take your time—smooth frosting is a mix of technique and patience.
6. Smooth the Top Edges Like a Pro
The top edge is often the trickiest part, but there’s an easy method:
- Keep the sides smooth first.
- Use your offset spatula to gently pull the frosting from the outside edge toward the center.
- This motion creates a clean, sharp top edge.
Repeat until the top looks polished.
7. Chill the Cake Before Decorating
Once you’re satisfied with the smoothness, chill your cake for at least 15–20 minutes. A chilled cake holds its shape better and allows for easier piping, drip designs, or toppings.
8. Extra Tips for a Smooth Finish
- Dip your spatula or scraper in hot water, wipe it, and then use it on the frosting for a glossy finish.
- Avoid overworking the frosting—too much smoothing can create air bubbles.
- Use American or Swiss buttercream for the smoothest results.
Final Thoughts
Learning how to frost a cake smoothly takes practice, but the right steps make it much easier.
By starting with a cold cake, using the correct tools, applying a crumb coat, and smoothing in gentle motions, you’ll be able to achieve bakery-style results every time.