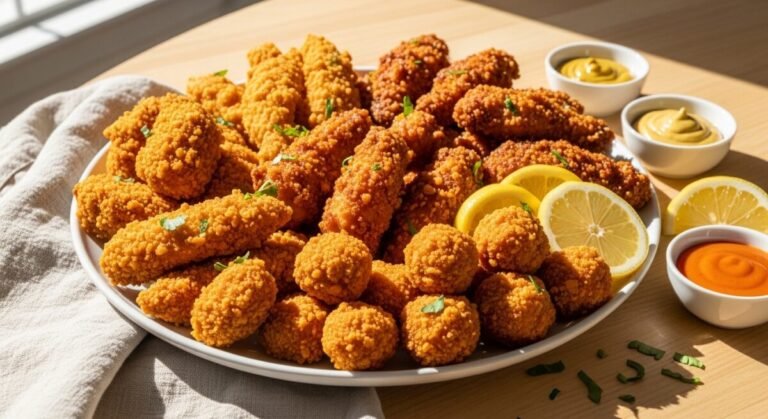
Crispy chicken on a Blackstone is all about two things: a dry, well-seasoned coating and steady heat that actually sets the crust instead of steaming it. If your breading slides off, turns soggy, or browns before the chicken is cooked, you’re not doing anything “wrong”—you just need a tighter process.
This guide walks you through exactly how to make crispy chicken on Blackstone like a pro, with the timing, temps, and small cues that make the crust shatter-crisp.
How To Make Crispy Chicken On Blackstone
You’re making thin, evenly cooked chicken cutlets with a crunchy, well-adhered coating—crisp on the outside, juicy inside. The Blackstone griddle gives you even contact for browning and enough space to cook in batches without crowding. With the right oil temp and a short rest after breading, you’ll get a crust that stays crunchy, not greasy.
Ingredients
- 1 1/2 lb chicken breast cutlets (or 2 large breasts, sliced into 4–6 thin cutlets for faster, even cooking)
- 1 tsp kosher salt (season the meat itself so it tastes good under the crust)
- 1/2 tsp black pepper
- 1 tsp garlic powder
- 1 tsp paprika (helps color and savory depth)
- 1/2 cup all-purpose flour (first layer for dry adhesion)
- 2 large eggs
- 2 tbsp water (loosens egg wash so it coats thinly)
- 1 1/2 cups panko breadcrumbs (key for crunch on a griddle)
- 1/3 cup grated Parmesan (optional, for extra crisp edges and flavor)
- 1/2 tsp baking powder (optional, helps the coating fry lighter)
- 1/3–1/2 cup avocado oil or canola oil (high-heat, clean frying)
- Lemon wedges (optional, to finish)
Step-By-Step Instructions

1) Prep the chicken so it cooks evenly
Pat the cutlets very dry with paper towels. Moisture is the enemy of crisp—if the surface is wet, the coating turns pasty instead of crunchy.
Season both sides with salt, pepper, garlic powder, and paprika. If any piece is thicker than 1/2 inch, gently pound it to an even thickness so the crust browns at the same pace the chicken cooks through.
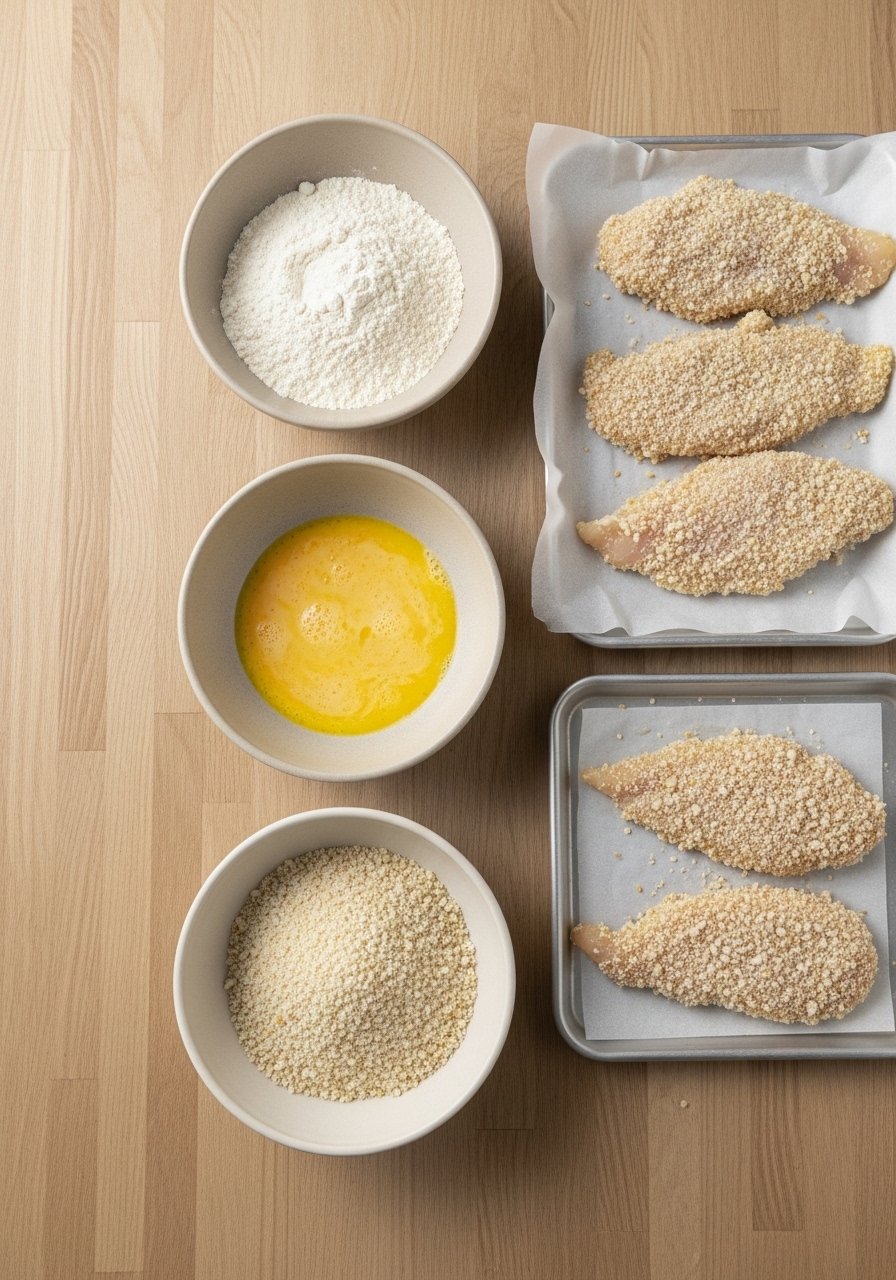
2) Build a coating that actually sticks
Set up three shallow bowls: flour in the first; eggs whisked with water in the second; panko (plus Parmesan and baking powder, if using) in the third.
Dredge chicken in flour and shake off the excess. Dip in egg wash, letting extra drip off. Press firmly into panko so you can feel it grab. That pressure is what helps the crust “set” instead of sliding off on the griddle.
3) Let the breading rest (don’t skip this)
Place breaded cutlets on a tray and rest 10 minutes at room temp. This short rest hydrates the flour/egg layer and helps the coating bond.
While it rests, preheat your Blackstone on medium to medium-high for 8–10 minutes. A quick-read thermometer like a ThermoPro Instant Read Meat Thermometer makes doneness easy later.
4) Oil + heat = crisp, not greasy
Add enough oil to create a thin, shimmering layer (about 1–2 tablespoons per cutlet area). You want it hot enough that a few panko crumbs sizzle immediately on contact, but not smoking.
Use a sturdy Blackstone Griddle Spatula to gently slide chicken onto the surface—don’t drop it (that can knock off coating).
5) Cook undisturbed, then flip once
Cook 3–4 minutes on the first side. Don’t move it around; leaving it alone builds the crust. When the edges look deep golden and the cutlet releases easily, it’s ready to flip.
Flip and cook 3–4 minutes more. Aim for 165°F in the thickest part. Move finished pieces to a rack if you have one; airflow keeps the bottom crisp.
Blackstone Temperature and Timing (So the Crust Sets)
For crispy chicken, medium to medium-high is your sweet spot. Too low and the coating absorbs oil. Too high and the outside burns before the center is done.
- Preheat: 8–10 minutes
- Typical cook time: 6–8 minutes total for thin cutlets
- Visual cues: steady sizzle, golden edges, easy release before flipping
If your griddle has hot spots, cook on the more even zone and shift finished pieces to a cooler area to hold. A Blackstone Infrared Thermometer helps you quickly find your best temp zone without guessing.
The Breading Station Trick That Prevents Soggy, Patchy Coating
A clean, organized breading station is the difference between even coverage and clumps that fall off.
First, keep one hand for dry and one hand for wet. That stops thick “glue fingers” that create bare spots and gummy patches.
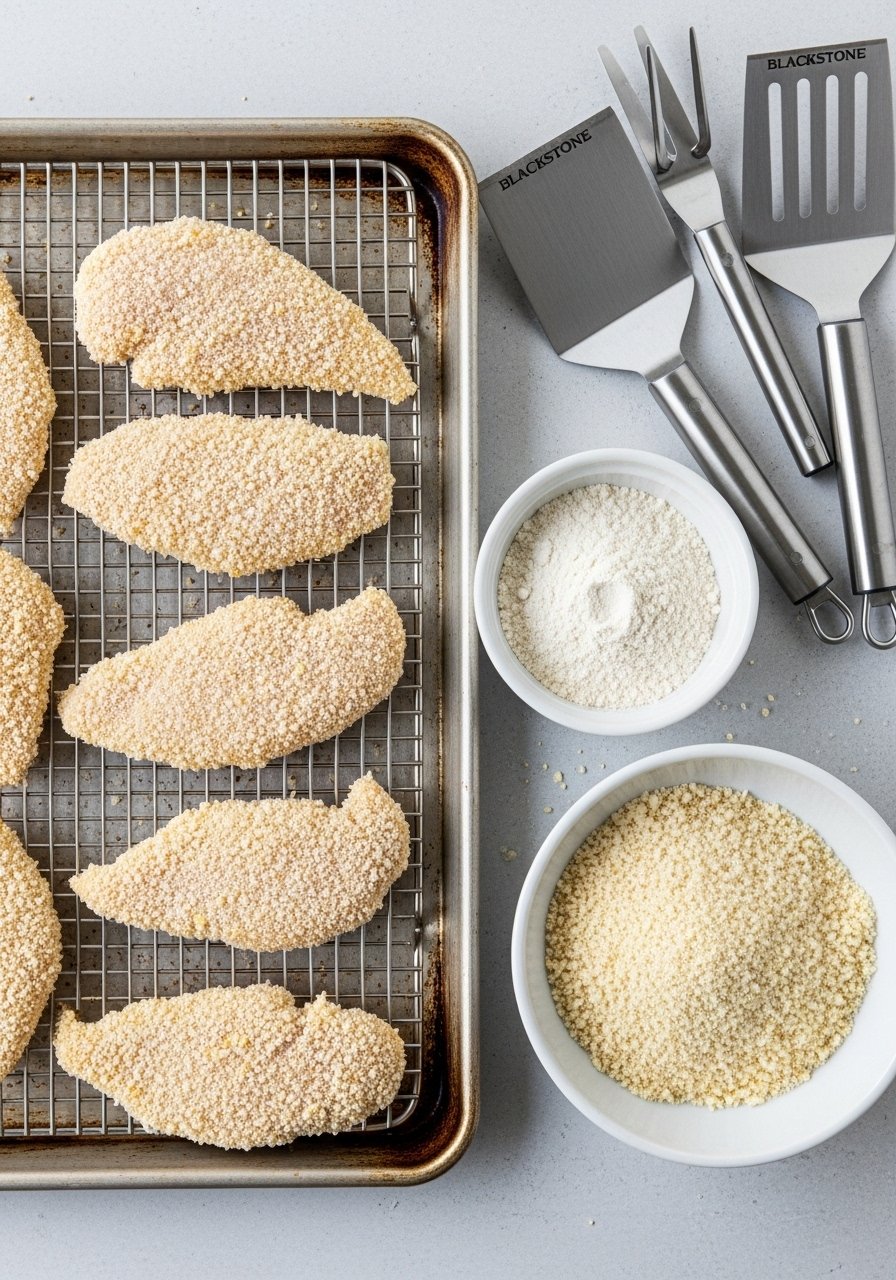
Second, rest the breaded chicken on a rack (not a flat plate) if you can. A Wire Cooling Rack for Baking lets air circulate so the bottom doesn’t turn damp while it waits.
Common Blackstone Mistakes That Ruin Crispy Chicken (And Quick Fixes)
If your chicken isn’t coming out crisp, it’s usually one of these:
- Breading falling off: You skipped the 10-minute rest, or you moved/pressed the chicken too early. Let the first side crust before touching it.
- Soggy crust: Griddle heat is too low or you’re using too much egg wash. Let excess egg drip off before panko.
- Greasy coating: Oil wasn’t hot enough at the start. Look for a lively sizzle the moment it hits the surface.
- Uneven browning: Hot spots. Rotate positions between batches or use an infrared thermometer to locate your best zone.
Also: avoid crowding. Leave at least 1–2 inches between cutlets so steam can escape instead of softening the crust.
Pro Finishing Moves for Maximum Crunch (Right on the Griddle)
Right after the flip, you can do one small move that makes the crust feel restaurant-level: a tiny oil refresh. Add a teaspoon of oil near the edge of the cutlet and nudge it underneath with your spatula. It helps the second side fry evenly without soaking the coating.
When the chicken hits 165°F, move it to a rack or the coolest part of the griddle for 2 minutes. That brief rest keeps juices in the meat and helps the crust stay crisp. Use Griddle Tongs to move pieces without scraping off the coating.
Final Thoughts
Crispy chicken on a Blackstone comes down to dry cutlets, a firm panko press, and enough heat to sizzle steadily. Rest the breading, cook undisturbed, and flip only when it releases easily.
Once you nail that rhythm, you’ll turn out crunchy, juicy chicken every time—no soggy coating, no stress.