You love roast chicken but hate when it turns into cardboard. This guide shows you, step by step, how to roast a whole chicken so the skin is crisp and the meat stays juicy—every time. You’ll learn exact temps, timing, and simple techniques that prevent dryness without fancy tricks.
Follow the clear steps and a few smart tools to get a reliably moist roast that’s beginner-friendly and repeatable.
How To Roast Chicken Without Drying It Out
This guide teaches you to roast a 3–4 lb whole chicken with crisp browned skin and juicy thigh meat. Expect savory, lightly herb-scented meat, crunchy skin, and pan juices perfect for a simple gravy. The result is tender, well-rested chicken ready to carve.
Ingredients
- 1 whole chicken (3–4 lb), giblets removed
- 1½ tsp kosher salt (about 1 tsp per pound) — seasons through the meat
- 1–2 tbsp softened butter or 2 tbsp olive oil — for under-skin fat and surface browning
- 1 lemon, halved — brightens flavor and adds steam
- 4 garlic cloves, smashed — aromatic inside cavity
- 4–6 sprigs fresh thyme or rosemary — simple herb aroma
- Freshly ground black pepper to taste
- Optional: 1 onion and 2 carrots, coarsely chopped to roast underneath and catch juices
Step-By-Step Instructions

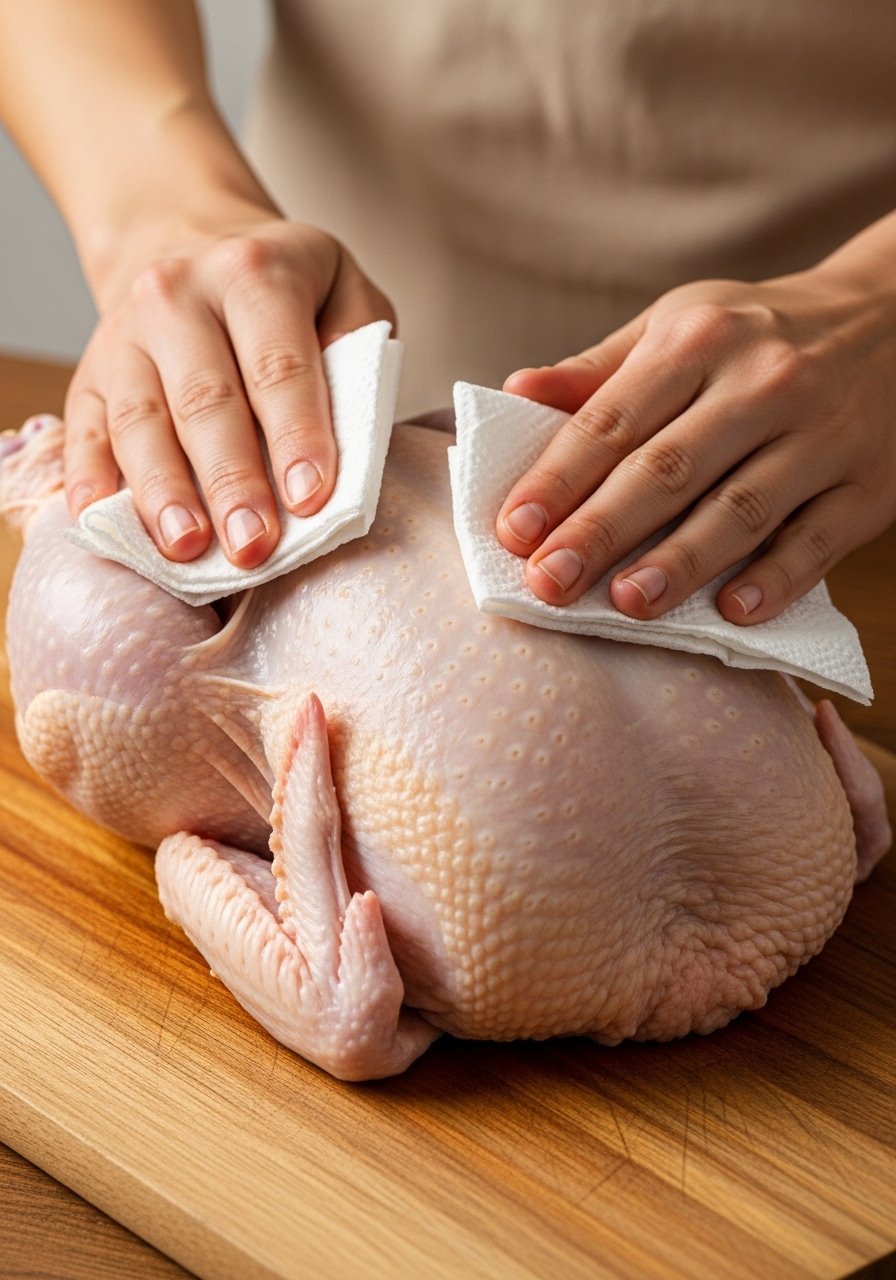
Prep and Dry the Chicken
Pat the chicken completely dry with paper towels—inside and out. Remove excess moisture so the skin crisps quickly at high heat. Season the cavity with salt, pepper, lemon halves, garlic, and herbs to infuse flavor from the inside.
Slip softened butter or oil under the breast skin using your fingers or a spoon. This adds fat directly to lean breast meat so it stays moist during roasting. Sprinkle the outside with the remaining salt and pepper.
Truss Lightly and Arrange
Tuck wing tips behind the back and tie the legs with a bit of kitchen twine to promote even cooking. Trussing keeps the bird compact so breasts and thighs cook at similar rates. Use Kitchen Twine if you need it.
Set the chicken breast-side up on a rack inside a roasting pan with chopped veg under it. Elevation improves air circulation so heat reaches all sides and juices collect separately.
Start Hot, Then Moderate
Preheat oven to 425°F (220°C). Roast at 425°F for 15–20 minutes to jump-start browning. Then lower oven to 375°F (190°C) and continue roasting. For a 3–4 lb chicken expect roughly 40–55 more minutes—about 55–75 minutes total. High-start then moderate heat locks moisture while crisping skin.
Check Temperature and Pull Early
Insert an Instant-Read Meat Thermometer into the thickest part of the thigh without touching bone. Remove the chicken when the thermometer reads 160°F (71°C); carryover heat will raise it to 165°F (74°C) during resting. Pulling at 160°F prevents overcooking.
Rest Before Carving
Transfer the chicken to a cutting board and tent loosely with foil for 10–15 minutes. Resting redistributes juices so they don’t spill out when you carve. Use the pan juices for a quick sauce.
How To Check Doneness Without Drying It Out
- Use the thermometer method above—visual cues alone can mislead.
- Wiggle the leg: when it moves easily at the joint, the bird is close.
- Clear juices that run when you pierce the thigh generally mean done, but temperature is best.

Resting And Carving To Preserve Juices
Rest 10–15 minutes tented with foil. Carve against the grain to maintain tender slices. Spoon pan juices back over the carved breast to moisten any lean pieces. If you want a simple pan sauce, deglaze the roasting pan with wine or stock and simmer for a minute.
Common Mistakes That Dry Roast Chicken
- Skipping the pat-dry step: wet skin steams instead of browns.
- Overcooking: rely on thermometer, not just time.
- No fat under skin: breast meat benefits from butter or oil applied under skin before roasting.
- Crowding the pan: good air circulation equals even cooking.
Best Tools That Help (Quick Picks)
- Roasting Pan With Rack — elevates chicken for even heat.
- Instant-Read Meat Thermometer — accurate doneness without guesswork.
- Kitchen Twine — for light trussing.
Final Thoughts
You can reliably roast a juicy whole chicken by drying, adding fat under the skin, starting hot, and using a thermometer. Resting finishes the job.
Follow these exact temps and cues; you’ll stop worrying about dried-out roast chicken and start enjoying repeatable success.