Macarons are one of those treats that look so cute and fancy, but they can be super stubborn.
You mix everything so carefully, you pipe them all pretty, you peek into the oven…and then when you bite into one, the top shell collapses like an empty balloon.
Ugh. I’ve been there. I’ve yelled at my oven more times than I can count.
So, why are your macarons hollow? And is it really that big a deal? Let’s break it down — easy-peasy style.
Hollow macarons: total fail or just a tiny flaw?
First things first: some gaps inside are actually normal. You don’t have to toss the whole batch in the trash.
If they still taste great, they’re worth eating (trust me, your friends and family will happily “help” you get rid of them).
But if your shells are mostly air inside and collapse when you fill them, that’s what we call “hollow macarons.”
It usually means something went wrong with the structure. The good news? You can fix it!
Step 1: Bake time & precision oven temps
Think of baking macarons like building a little house. If the “walls” don’t set properly, they’ll cave in.
- Underbaked macarons: The inside stays gooey, and the top shell can’t support itself.
- Overbaked macarons: The shells get too dry, and you end up with big gaps.
Check your oven!
Most home ovens lie (yep, they’re sneaky). Get a cheap oven thermometer and see if your oven is actually at the temperature you think it is. Even 5–10 degrees off can mess up macarons.
Step 2: Mastering meringue
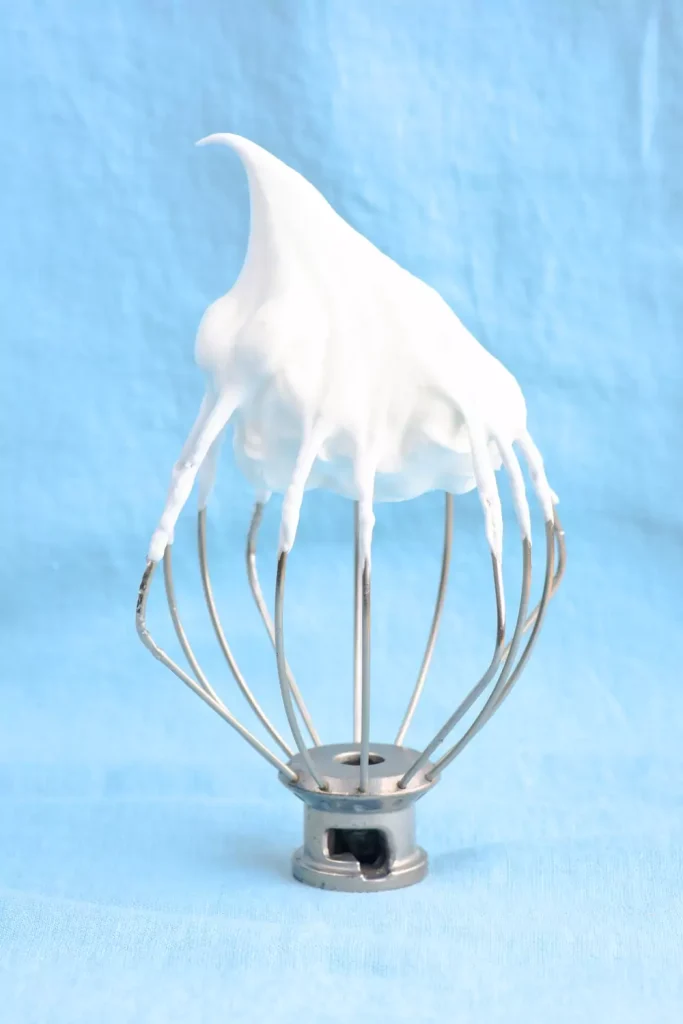
The meringue (whipped egg whites with sugar) is like the backbone of your macarons.
- Under-whipped meringue: Too soft, so your shells can’t hold up.
- Over-whipped meringue: Too stiff and dry, which causes cracks and hollow shells.

Look for stiff peaks: When you lift your whisk, the meringue should stand up like a little bird beak. Not droopy, but not so stiff it looks clumpy.
Step 3: Macaronage (the fancy word for folding)
After you make the meringue, you fold in your almond flour and powdered sugar. This part is called macaronage (sounds fancy, but it’s basically “folding stuff together”).
- Under-folding: Batter is too thick, traps too much air → hollow shells.
- Over-folding: Batter gets too runny, shells spread out too much → weak tops.
Do the “figure 8” test: Pick up some batter with your spatula and try to draw a figure 8 in the bowl without the batter breaking. If you can, it’s ready!
Step 4: Resting & membrane formation
Before baking, you let your piped macarons rest so they form a skin on top.
- Too short: No skin → shells crack and hollow.
- Too long: The batter starts to break down → thin, weak tops.
Ideal rest time: Usually 20–45 minutes. If you touch them gently and they don’t stick to your finger, they’re ready to bake.
Humidity tip: If it’s rainy or humid, they might take longer. Use a fan or air conditioner to help.
Step 5: Structure boosters
Want to give your shells some extra strength?
- Egg white powder: Helps stabilize meringue.
- Cream of tartar: Also makes the meringue stronger.
- Cornstarch: Some people add a little to absorb moisture and help with structure.
These aren’t musts, but they can help if you keep getting hollow shells even when your technique is good.
Step 6: Piping & tapping
Once you pipe your cute little circles, they need a good smack (seriously!).
- Gently bang your tray on the counter a few times. This gets rid of big air bubbles hiding in the batter.
- Use a toothpick to pop any visible bubbles on top.
It feels weird to “attack” your pretty piped shells, but this step really helps avoid hollows.
Conclusion
Here’s the big secret: change one thing at a time. If you try fixing everything at once, you’ll never know what worked.
And finally, remember: macarons actually taste better after “maturing” in the fridge for a day or two. The shells soak up the filling, get softer, and sometimes even fix tiny hollows a bit.